
Supermarine Spitfire Mk-Vb "The Few"
"Never in the history of mankind has so much been owed by so many to so few - Winston Churchill"
The symbol of British Aviation and the fear of the German Luftwaffe. The Spitfire left a huge impact on history ever since the first introduction in the early days of WW2, and is regarded by many as the plane that saved Great Britain from a German invasion. Now living in the UK myself, the time was right to cross her off my model-bucketlist. "The Few" is dedicated to this great icon of aviation, and the pilots that flew her.
Model Info
Scale: 1/24
Manufacturer: Trumpeter
Status: Completed
Date Started: August 01, 2016
Date Finished: July 13, 2017
The Making of
Photoshoot
Photoshoot
Posted on July 13, 2017 by Niek Nijsen
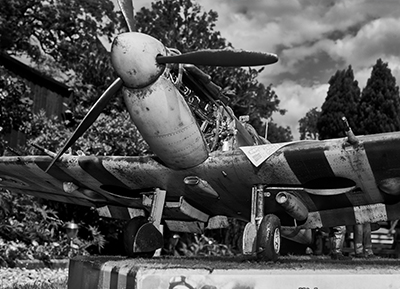
With the engraved title plate added, I can now call this model finished.
It was a really nice day yesterday, so I decided to take some photos of her out in the garden instead of in a photobooth. I'm a strong believer in that real light brings out the details a lot better. But you can be the judge of that. Find all the photos via de link provided above and please, do let me know what you think.
Thank you very much for following me on this build, and I hope to see you all back at the King Tiger project, which is now back in full force. See you there!
More Photos
Ready for battle
Posted on June 21, 2017 by Niek Nijsen
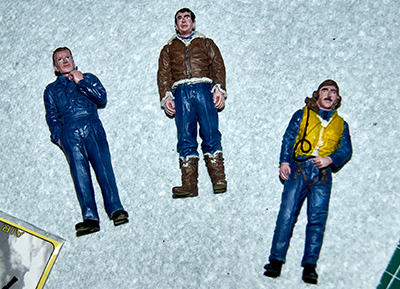
With the model now pretty much done, I started work on the base. I saw this great idea on the Flory Forum and thought it would look really good for this model. As you may have noticed, I like to create a diorama-type base for all my models (Aside from the Space Shuttle). So for this one, I would add a few figures and place it all in a muddy field somewhere in the UK.
I bought a cheap photo frame and removed the glass before gluing the bottom to it. I cut strips out of 2 mm plastic card, which would form the sides of the box. To strengthen it all I placed rectangular tubes on the inside of each corner. The top was made of a thin hardboard sheet. Once all the glue dried (I coated the inside with regular hobby glue to get a solid bond and fill all the gaps the superglue had left behind) I coated the top with a layer of filler and shaped it to my liking. The sides where then filled as well to make all the corners look smooth.
Read more
Oldschool for old plane
Posted on June 05, 2017 by Niek Nijsen
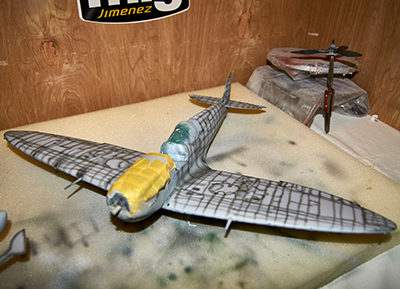
Last time I wrote something about the Spitfire I left you with a model halfway stripped of its paint. Now, after going back to using lacquer paints again, I’ve got some good news! But let’s go back to the where we left off previously.
I continued the process of stripping paint as described before, only this time I was clever enough to wear some cloves. Saved me a lot of cleaning up afterwards. Using a big brush and lacquer thinners I stripped the remaining paint before priming the whole model again with Mr. Surfacer 1200. This was then followed by pre-shading using MRP’s Nato Black (MRP-77). I’ve heard Phil talk about it a lot, but I couldn’t believe how easy this stuff is to spray! I was hooked straight away and will never use any other paint again. The fact that it’s so extremely thin makes it perfect for spraying in thin layers, allowing previous paintwork to come through without covering it too fast. Brilliant.
Read more
Another Real update?!
Posted on [Month] [Day], 20xx by Niek Nijsen
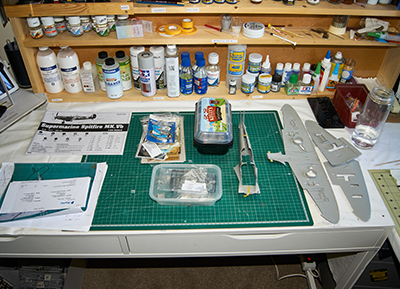
Before I start writing to you about the latest on this build, I owe you a big apology for the enormous gap in updates. As you may know, I have moved house a few months ago and had to rebuild my modelling cave from scratch. This resulted in preventing me from doing any work on my models and caused a big delay in the overall progress. However, the new cave is finally complete and I am ready to get back to work on the Spitfire. For those interested in my new (and old) model cave, have a look at the special page I’ve created for it. It has photos of all my model areas, starting in the USA all the way up to the latest one in my new house.
So, with the formalities now out of the way, let’s get started with this update and get you back in the loop on what’s going on with the Spitfire.
Read more
In the name of details
Posted on October 20, 2016 by Niek Nijsen
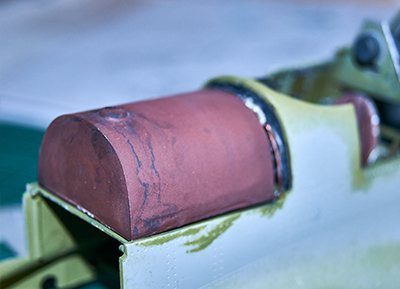
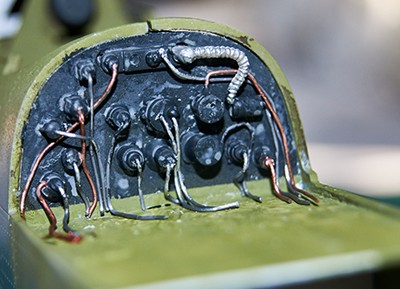
With the King Tiger set aside for this month, it’s time to focus on the Spitfire again. My aim for this period is to complete most of the detail work, which includes the instruments, fuel tank, and engine.
First I had to come up with something to avoid looking through to the front when taking a peak into the cockpit. I placed a vertical piece of styrene to block the view and glued another one on top to act as a support for the fuel tank. I’ve decided not to go into too much detail here as it will all be hidden from sight once the tank is in place.
Read more
On the assembly line
Posted on September 21, 2016 by Niek Nijsen
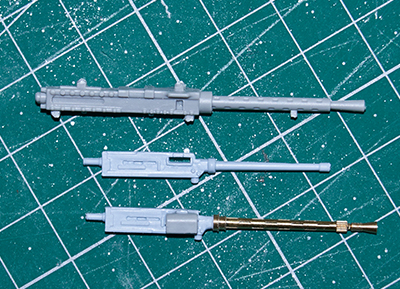
Time for another update on the Spitfire buddy build. Since I’ve got two projects on the go (yes I’m still working on the King Tiger) I will try to swap them each month, so progress will be going on with both models. Be it a little slower than before (if that’s even possible)…
So what has been happening to the Spitfire then over the last couple of weeks. Well, in a nutshell I’ve put the fuselage together, worked on the wings and upgraded the guns. But let’s get into a little more detail.
Read more
In search of allies
Posted on August 14, 2016 by Niek Nijsen
Having enjoyed building the F-16 as part of a massive group build so much, I became interested in finding others who were planning on building the 1:24 Spitfire as well. It seems there are a few different kits out there, and this would be a great way to compare some of them. After having posted the initial request on a model forum, I quickly got a few replies and a so-called “Buddy Build” was born. I had found my Allies for this project.
So where do I begin when I start a new project? Well, I basically stare at it for a few hours and draw multiple images of what I’d like to open up and display once finished. When I’ve got a few ideas on paper, it’s time to choose the best and most possible option and think of how to actually achieve this. Followed by a search online for the aftermarket parts I’ll need and (mostly) a huge shopping list as a result, I start spending some cash and collect the various bits needed for the project.
Read more
Niek Nijsen Ltd.
Comp. Reg. (UK): 13778584
VAT. Reg. (UK): 398 4757 24
info@nieknijsen.com
Copyright
Niek Nijsen Ltd. © 2008 -
All Rights Reserved
Privacy Policy | Terms of Business