
In search of allies
Posted on August 14, 2016 by Niek Nijsen
Having enjoyed building the F-16 as part of a massive group build so much, I became interested in finding others who were planning on building the 1:24 Spitfire as well. It seems there are a few different kits out there, and this would be a great way to compare some of them. After having posted the initial request on a model forum, I quickly got a few replies and a so-called “Buddy Build” was born. I had found my Allies for this project.
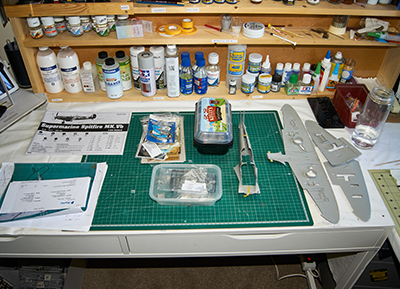
So where do I begin when I start a new project? Well, I basically stare at it for a few hours and draw multiple images of what I’d like to open up and display once finished. When I’ve got a few ideas on paper, it’s time to choose the best and most possible option and think of how to actually achieve this. Followed by a search online for the aftermarket parts I’ll need and (mostly) a huge shopping list as a result, I start spending some cash and collect the various bits needed for the project.
Interesting you might think, but where does this leave the Spitfire then? A good question indeed, and this is what I have in mind; The aircraft will be closed up from the cockpit to the tail and everything in front on the cockpit will be opened up, so no panels at all in order to show the engine, fuel tank and all the instruments. I’ll have to scratch build the fuel tank, firewall, and all the details that come with it. And that’s not even including the engine, which will be the main focus once finished.
This project will be enhanced by a lot of scratch building, but also the following aftermarket parts:
- Reference books
- SAC metal landing gear
- MST masking decals
- MasterCasters PE flaps
- Grey Matter Figures corrected vertical stabilizer
- Grey Matter Figures corrected seat
- Grey Matter Figures throttle / control stick
- Grey Matter Figures corrected aerial mast
- Grey Matter Figures corrected exhaust
- Master Model brass guns
- Airscale cockpit decals
- Airscale instrument panel
- Trumpeter masking decals
- HGW fabric seatbelts
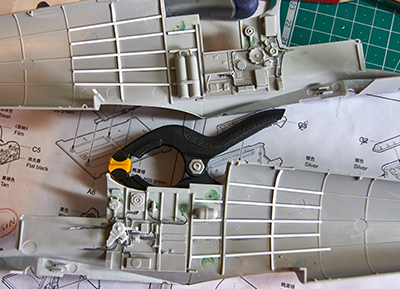
The model isn’t designed to be opened up, and I began by cutting out various panels and support struts for the engine. With these bits out of the way, I could finally see how much work this was going to take, as most panels weren’t supposed to be shown. For me to add all the instruments, I’ll have to thin the instrument panel and move it slightly into the cockpit. To do this I had to shorten the side panels inside the cockpit, which will be super detailed with lead wires and various decals.
Having never worked with lead wire before, it took me a few attempts to get the hang of it and quickly began adding wiring to the both the left and right side of the cockpit. With photos of the real aircraft as my guide, I placed most of the wiring with various thicknesses of lead wire. Since we’re working in scale, I didn’t want to overdo it and make it look too busy in there, especially with the many decals that would follow.
With the wiring done, I added all the ribbing behind the last "frame" because you'll be able to see it when it's put together. For this I used thin strips of styrene, which were glued in place. I figured this would be enough to give that 3D effect without wasting too much styrene on something you'll hardly ever see. The resin seat was a real pain to put together and required quite a bit of changing to get it to fit eventually. A combination of resin, styrene rods and kit parts are used to achieve this.
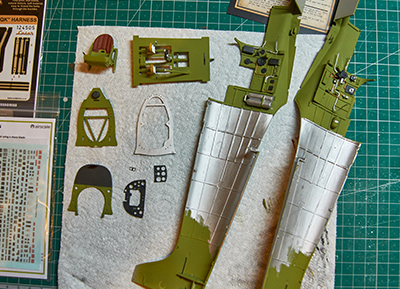
Next up was spraying all the various bits for the cockpit with RAF Interior Green. I discovered an old pot of Humbrol Enamel 226 which is actually Interior Green, but found it too dark. I mixed it with Humbrol Enamel 34 white until I was happy with the colour before spraying everything with it (I used the usual Mr. Surfacer as a primer). Once dry I hand-painted all the small parts with various buffable colours (I like the metallic effect, not actually planning on buffing them) and anthracite black by Revell Enamel 9. Just before calling the cockpit done and ready for weathering and decals, I noticed the aft bit of the aircraft is supposed to be bare metal. So out with the Mr. Metal Color again to correct the mistake and make it all look nice and shiny back there.
Now that the base colours are all in place, I used the special RAF WW2 aircraft decals by Airscale to bring the cockpit to life. Again using the photos, I searched for similar looking labels and added them to various places. I must admit a bit of an artistic license was used here, too. With this job done, I weathered it all and made it look like a well-used aircraft. The instrument panel was painted and lightly dry-brushed with metallic paint to highlight the instruments before gluing this in place.
Return to Previous Page

Niek Nijsen Ltd.
Comp. Reg. (UK): 13778584
VAT. Reg. (UK): 398 4757 24
info@nieknijsen.com
Copyright
Niek Nijsen Ltd. © 2008 -
All Rights Reserved
Privacy Policy | Terms of Business