
Another Real update?!
Posted on April 28, 2017 by Niek Nijsen
Before I start writing to you about the latest on this build, I owe you a big apology for the enormous gap in updates. As you may know, I have moved house a few months ago and had to rebuild my modelling cave from scratch. This resulted in preventing me from doing any work on my models and caused a big delay in the overall progress. However, the new cave is finally complete and I am ready to get back to work on the Spitfire. For those interested in my new (and old) model cave, have a look at the special page I’ve created for it. It has photos of all my model areas, starting in the USA all the way up to the latest one in my new house.
So, with the formalities now out of the way, let’s get started with this update and get you back in the loop on what’s going on with the Spitfire.
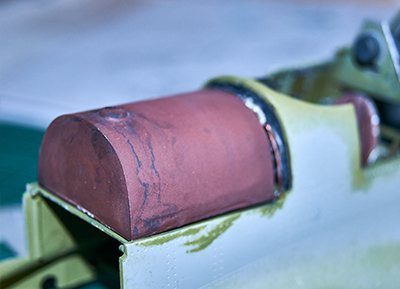
The previous entry left us with a model drying in the sun after the cockpit had been completed and the fuel tank painted. I continued my build by shifting my focus to the front section of the plane, namely the engine and mountings. I decided that I would have the bottom panel installed, so I began by filling the ejection markings with putty and sanded it all smooth once dry. The engine itself was put together and the frame was dry-fitted to make sure it would all fit before painting the various sub-assemblies.
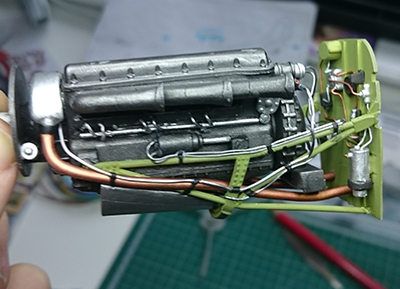
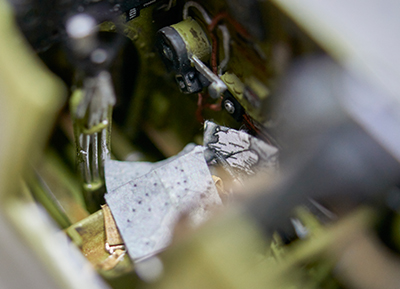
Next I started detailing the front bulkhead, on which a lot of components and wiring are visible. Using various spare parts from other kits, I tried to add the missing bits and connected them using different sizes of lead wire. A few plastic strips were added to give the bulkhead a more 3D appearance and holes were filled with putty. Once this work was finished, I painted all the parts (bulkhead, engine, mounts and panels) and used a small brush and various metal colours to paint the wiring and other small items.
With the paint dry and all the small bits painted, it was time to start detailing the engine, which will be one of the focus points of this build. Again using lead wire for most of it, I also used thicker electrical wire to create the piping for the cooling system. These were then bend into shape to follow the same route around the engine as in the real machine. The more wiring I added, the more this engine started to come alive. And by the time everything was painted, it looked quite convincing. The “straps” that hold the wiring in place were made from hobby glue using a cocktail stick, which I then painted black.
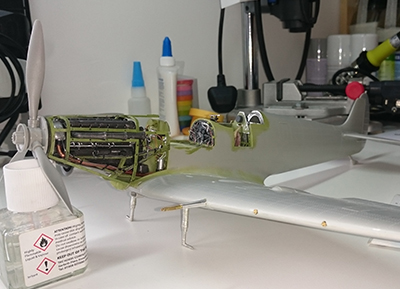
With everything now detailed and put together, I shifted my focus back to the fuselage, as I would have to add the wings before the engine could be mounted. To my surprise these fitted exceptionally good (especially for an older kit like this) and took little effort to be sanded smooth and make them seamless. I re-scribed the panel lines that disappeared during the sanding before adding the flaps that I build earlier on. I finally got a real sense of the size of this kit, despite having the engine and prop not attached yet.
Now that the wings had been attached, all the mounting points were now in place and the engine could be fitted. I made a small support for the front bulkhead, primarily because the engine had become quite heavy with all the lead wiring, but also to make sure the bulkhead would sit properly. The “cage” around the engine, which is used to attach the panels to, was put in place and the whole assembly then glued into the plane itself. I temporarily attached the prop to make sure everything lined up correctly and allowed the glue to cure overnight.
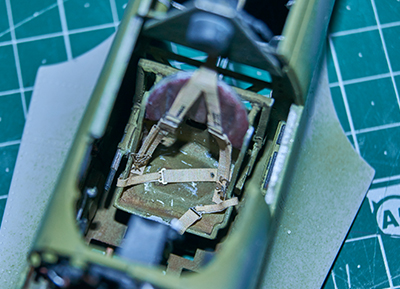
I noticed that a lot of the reference photos of cockpits showed a large amount of maps laying around in them. So I searched the web for some good photos and scaled them down to the correct size using Photoshop. These were then printed onto paper and cut out using a knife. I folded the maps many times in different ways with a ruler to weather them and make them look old and used. A very diluted wash went over to tone it done a bit before I glued them in place. Two were placed between the seat and side of the cockpit, while one is laying on the seat, resting against the yoke. I think it all adds to the realism and really brings the cockpit to life, especially once the pilots have been added standing around in the final diorama.
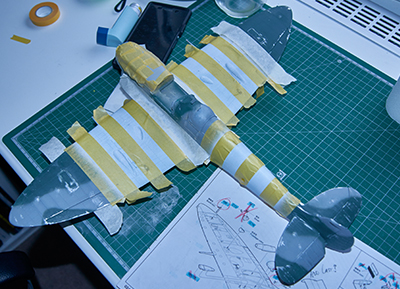
All the subassemblies were now completed, and the time had come to start painting the model. As I initially mentioned, I wanted to paint this using acrylic paints, instead of my old-school way of using enamels. It turn out this was the biggest mistake I had ever made in modelling so far, but more on that in a bit. The model was masked using the panels to cover the engine and a combination of blue-tac and masking stencils for the cockpit windows and instruments. I started by applying a primer coat using thinned Mr. Surfacer like I always do. I then followed with a layer of metallic paint, which would be underneath the final coats of paint, allowing me to chip the model in the stages that followed. Various places all over the model were masked using a liquid masking solution (Masking Sol Neo) before pre-shading the entire model using black paint. This is were I started to notice the trouble with acrylic paints, as my airbrush struggled to spray it, no matter how much I thinned the paint. Spitting, irregular coverage and constantly having to clean the nozzle severely slowed down the process and resulted in a finish far from perfect. But I decided to push on, determined to make this stuff work.
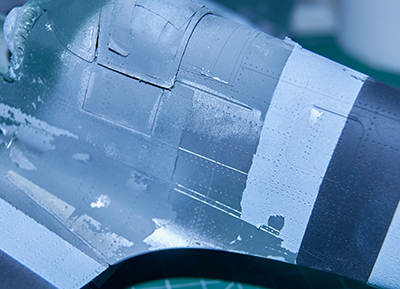
The bottom was sprayed in Sky-Grey, which went on pretty good actually. Weird when I think of it now, as I hadn’t changed anything to my mixture or airbrush setup. But when it came to the top half of the aircraft, I ran into the same problems again. Eventually I managed to spray the whole model, but it had taken me almost 4x longer than usual. The only advantage I noticed was the quick drying process, which took mere hours instead of days. Using a cocktail stick and an old toothbrush, I proceeded to remove the masking solution, which had turned into a rubbery layer. It wasn’t too difficult to remove, but for whatever reason it decided to lift large parts of paint that surrounded it along the way. I was left with a model that was chipped so badly, I had to start over. Instead of re-applying the liquid masking stuff, I decided to try something else. I had this small bottle of chipping solution laying around and sprayed the whole model with it. Technically this should form a layer between paints that can’t be removed using water or scraping, allowing for fine chipping and scratching effects. It only works with acrylics, which made it “perfect” for this project. Anyway, with this product now covering my metal paint, I covered everything with the grey/green paint combination again. Once dry, I gently scratched the surface using cocktail sticks, water and paintbrushes to try and let the metallic paint shine through. I must say, it didn’t turn out too bad on the wings, but the main fuselage still wasn’t looking like I wanted it to. Instead of trying it again, I figured adding metallic paint using a sponge later on would be a lot easier and continued to mask the model in preparation of the invasion stripes.
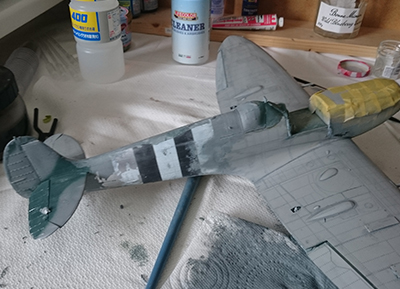
Never had problems with Tamiya masking tape before on enamels, I was unsure of the effect it would have on acrylics and I opted to “de-tac” the tape by sticking it on my arms and hands a few times before applying it to the model. I sprayed the black and white, which took forever and left me with a horrible finish, before removing the tape. And what then happened became the final straw for me in my short adventure of acrylic paints. As you can imagine, it lifted most of the paint, leaving a horrifying scene behind. Having pulled out a few hairs while shouting various words that can’t be mentioned here, I was left with only one option. Adamant I wasn’t going to bin this model, I tossed the acrylics in a corner of my workbench (the only reason they didn’t end up in the bin is for the fact I might be able to use them to paint the figures for my models) and went straight to the website of MRP. It’s time to throw health and safety into the wind and go back to using proper paints. It’s time to bring in the lacquer paints from Mr. Paint. Sure, I’ll have to wear my respirator mask again, but that’s a price I am more than willing to pay. After having spend a small fortune on new paints, I was left with the job of stripping the paint off the model, all the way back to the bare plastic. Initially I tried using acrylic airbrush cleaner in an attempt to save my primer coat, it took way too long and I couldn’t be bothered any longer. Having tried using it on a test model, I continued using lacquer thinners to strip the model of this rubbish acrylic crap, speeding up the process quite significantly.
And this is where we are now, with a model that’s halfway stripped of paint. I have received my new paints from Slovakia and am eager to give these a try. So far I’ve only heard good things about them. As soon as I get to it, I’ll post an update on the process, probably once the painting is done. Until then, enjoy the photos and as always comments are welcome!
Return to Previous Page
Niek Nijsen Ltd.
Comp. Reg. (UK): 13778584
VAT. Reg. (UK): 398 4757 24
info@nieknijsen.com
Copyright
Niek Nijsen Ltd. © 2008 -
All Rights Reserved
Privacy Policy | Terms of Business