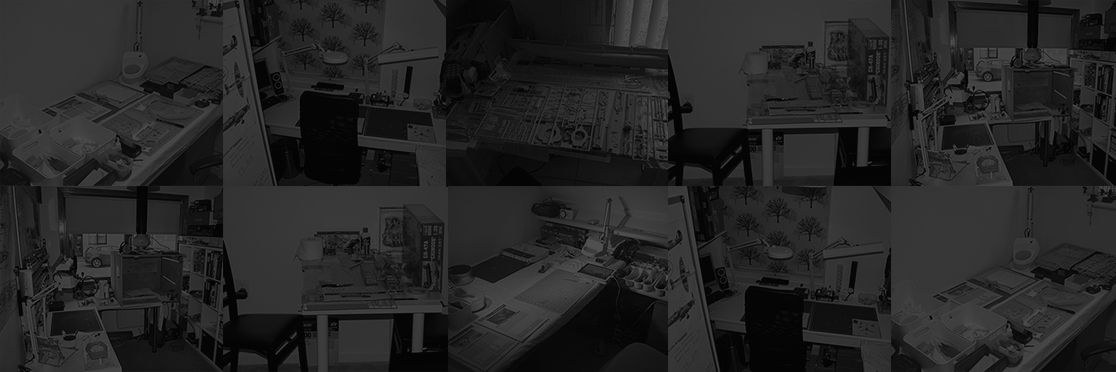
The Studios
Some of you might wonder where I build all my models. The studios, also known as the bench, are listed below from start to most recent. Each also explains a bit about the studio and which models I made there.
Model Info
Scale: 1/1
Manufacturer: 100% Scratchbuild
Status: Completed
Date Started: October, 2011
Date Finished: Will it ever?
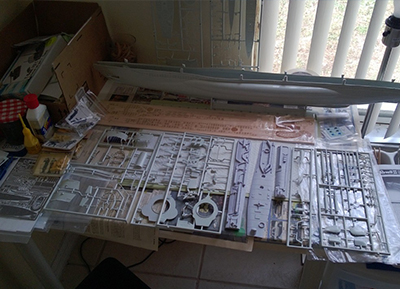
Titusville V1.0, FL. USA
October 2011 – December 2011 by Niek Nijsen
My very first "studio" was nothing more than the dining table in my living room. I had just started my flight training and hadn’t built any models for a long time. I owned only the basic tools and a lot of general household items were used while working on the Chinook. My spraybooth was nothing more than a carton box outside on the patio, and the airbrush was a plastic “toy” used to paint prints on t-shirts. How far I’ve come since the good old days…
In here I brought my hobby back to life and began work on the Chinook.
Titusville V2.0, FL. USA
January 2012 – February 2014 by Niek Nijsen
Over Christmas I moved house to live with one of my classmates, and as such I had to find myself a new cave. I ended up in one of the corners of the living room, but out of the way of anything else so I wouldn’t have to pack it up each time someone would visit us or stay for dinner. Again this setup was nothing more than a small table to work on and I found myself a drawer unit and lamp to expand my work area with. I slowly added tools and paints to my collection, as well as a new airbrush (still a crappy Chinese knock-off but at least with a dual action trigger).
In this studio I finished the Chinook, Space Shuttle and U96.
Enschede, The Netherlands
March 2014 – June 2014 by Niek Nijsen
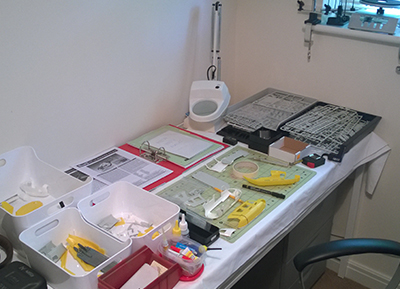
With my training completed in the USA, I moved back to Europe and spent the next couple of months completing my European part of the training. While I was flying in the UK, I converted my old desk at my parent’s place (which I used for my RC helicopters in the old days) to work on my models. I’ve only worked a small amount at these desks before moving to the UK for my new job. At least my dad is now using them to build his 1/8 Pocher Mercedes 540K (or so I hope).
The only model I worked on at this bench is the BK-117, which is now stashed away in the bin somewhere…
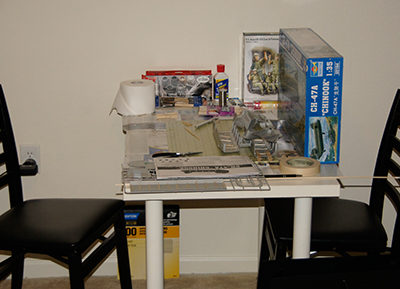
Kibworth V1.0, UK
August 2014 – June 2015 by Niek Nijsen
With my new job in the UK, I moved to my new apartment in the Midlands. While I worked in the Oil & Gas sector in preparation for my job in SAR, I was on a 2/2 roster, which meant I’d work 2 weeks followed by 2 weeks off. Anyway, it left me with plenty of time to work on my models, so as a result my girlfriend allowed me to use the spare room as my cave. It was furnished with 2 simple Ikea desks (although one was for the PC setup) and a large shelving unit, also by Ikea. It was the first time I had a real cave and enabled me to expand on my tools and equipment quite extensively. Still using my cheap Chinese airbrush, at least I now had a proper compressor and I build myself a real spraybooth with extractor and lights.
During the year I was in here I worked on the BK-117 and the Hind.
Sumburgh, UK
August 2015 – November 2016 by Niek Nijsen
Now with my year in Oil & Gas coming to an end, I was relocated to Sumburgh in the Shetlands for my new job in SAR. And thus I once again had to move all my modelling equipment and build myself a new cave. With not a lot to do around here, I spent quite some time making the cave as best as I could. I build myself a paint rack, an additional workbench and bought my first proper airbrush.
In here I finished the Hind, build the Orange Lion and the F-16 for the Flory Models Group Build “I must be an animal”, worked on the King Tiger and started the Spitfire.

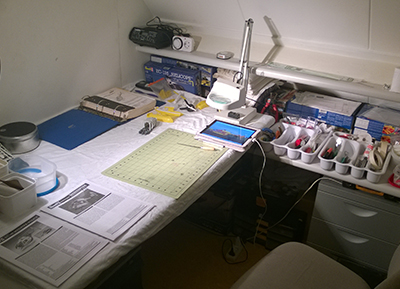
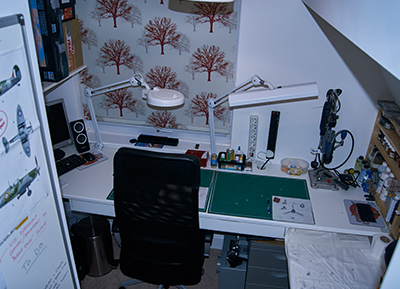
Kibworth V2.0, UK
December 2016 - July 2019 by Niek Nijsen
Despite still working in the Shetlands, my better half and I bought a house in Kibworth, this time on the other side of the village. Once again I was allowed to convert the smallest room in the house (aside from the toilet) to my model cave and I moved all of my belongings down south again. Over the holidays my dad and I build a custom desk system and shelving unit. What’s so special about these desks is that the main one is at a height of 85 cm, preventing me from having to bend over all the time when working on small items. The painting section is on a lower bench at 72 cm to keep them separated and minimising dust contamination. In the left corner is space for a small PC (I didn’t want my main PC to get dusty from all the sanding while working on the models) and a shelving unit is placed next to it. A large whiteboard is mounted to the wall when you walk in, which has space for two projects that I’m working on with various reference materials, to-do lists and other notes. Two large swivel lights have been mounted to the desk and the spray booth has been enhanced with an active carbon filter, which will come in very handy now that I’m moving back to enamel and lacquer based paints (read all about it in my Spitfire blog, update "Oldschool for old plane"). The paint rack has been slightly modified to fit the new room layout and stores all my paints, washes, pigments and more.
In here I finished the King Tiger, Spitfire, British WW1 Tank and the Mercedes AMG GT3. I also began work on the Saturn V, Horten Ho229, Wonder Woman and the RAF Trio.
Stoughton, UK
August 2019 - Present by Niek Nijsen
The last stop in a long journey, I'm definitely planning on making this my final and permanent studio. Split between a room in the house and the spray booth in my garage, it's the biggest one I've ever had.
As before, the L-shaped main work bench is custom made to sit higher than a standard desk, which helps me by not having to bend over as much when working on small items and hopefully “saving” my back in the long run. On the left side is where I have all my books for reference as well as space for all the sprues. A TV is located on a shelf above this which is linked to my PC for easy displaying of online photos, tutorials and episodes of my favourite model vloggers.
The middle section is where all the work on the actual models is performed, with two A3 size cutting boards mounted to the desk to stop them from sliding around. Two movable desk lights provide ample lighting to work on even the smallest details, especially with the incorporated magnifying glass. Between the cutting mats and wall is space for the assembly manual and completed parts, with on the wall itself the trusty old whiteboard, although this time mounted on its side, where I can keep a tab on things left to do along with a shopping list.
Moving to the right side of the desk is where I keep my tools in 4 stacks of drawer units (which I got very cheap at a local discount store). Above that is where I keep all my acrylic paints (non-airbrush), pigments, washes, oils and anything else I use for weathering my models. The rack I keep the paints in is actually designed for nail polish but does the same job as an expensive “model paint rack” for less than half the cost.
The spray booth and airbrush are kept in my garage, in an attempt to keep the paint fumes out of the house. The desk is also used for my car restoration project, so the old booth I had has been replaced. The new one is a lot thinner, has 2 extractor fans that go straight out the wall and the filters are actually located behind the model instead of above. I might add additional lights if required later on. The compressor for the airbrush is located underneath the desk and all my lacquer paints are mounted on the wall using another nail polish rack. An old TV has been mounted to the wall above it for displaying references during the painting process.
In this new studio, I finished any previously started models such as the Horten Ho229, Saturn V rocket, Wonder Woman and the RAF Trio. And since I’m not planning on moving again, I suspect all my future models will be put together in here as well.

Niek Nijsen Ltd.
Comp. Reg. (UK): 13778584
VAT. Reg. (UK): 398 4757 24
info@nieknijsen.com
Copyright
Niek Nijsen Ltd. © 2008 -
All Rights Reserved
Privacy Policy | Terms of Business