
The Upper Office
Posted on July 16, 2016 by Niek Nijsen
I’m still alive… Although it’s been so quiet on this blog you might think otherwise. Having focused primarily on finishing the F-16 before the deadline, the King Tiger has progressed very slowly. Over the last couple of months (though mostly during the last few weeks) I’ve managed to do the following:
- Add welds to the turret
- Filling gun with lead
- Finished driver's seat
- First sheet of zimmerit
- Started on the turret basket
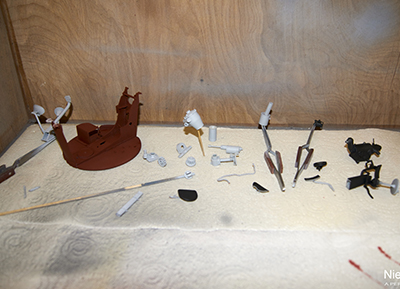
- Painted various parts of the basket
- Build a stand for turret
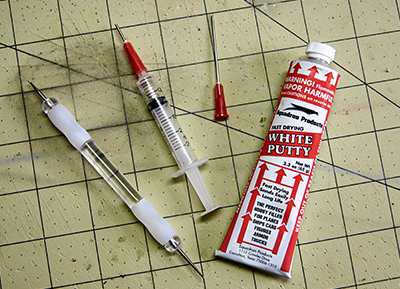
Now that I’ve cut open the turret, I will have to add a lot of details to the inside of it. This consists primarily of adding welds and wires, and a few other small bits. I started by gluing a few pieces in place, mostly around the commander’s hatch. Once these were in, I added the welds using the putty and a syringe technique as described in my previous post. All the major welds are now done inside, only a few small ones left to do.
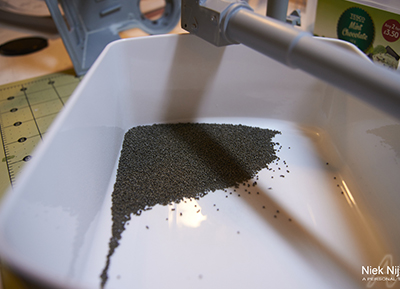
I’ve been thinking about the following problem for a little while now, and trying to come up with a solution to this problem. I’m talking about the heavy gun barrel and how I can counter balance it to prevent the turret from falling off and the gun pointing downwards all the time. I placed the barrel assembly on a scale and tried to get the center of gravity on the turret mounts by adding lead inside the gun assembly itself. Turns out I needed roughly 75 grams to get it all balanced. I then added a thin sheet of styrene to seal off the gun before pouring in the load pellets mixed with PVA glue to create a solid lump. This was then left to dry for a few days. I’m still debating whether to put lead into a few shells in the back of the turret to counter the whole gun assembly and prevent the turret from falling over. But that’s something I’ll have to figure out once it’s all done and fitted to the tank.
Although (most of) the hull is complete, I still had to do the driver’s seat. With a piece of wood and some nails, I tried to make a small jig to bend the springs, but after 4 attempts, I slightly altered the design of the wavy-type springs and went with coils instead. Although it’s slightly wrong, I don’t’ think anyone will notice when looking at it. A compromise I was willing to take.
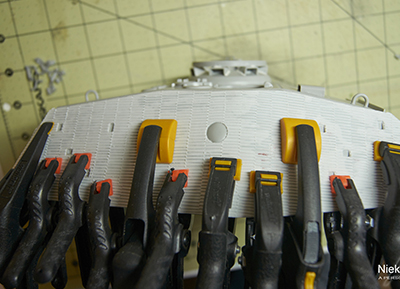
With all this work on the inside, I shifted my focus to the outside for a bit and wanted to try some of the zimmerit sheets. They’re basically thin sheets of resin that you glue onto the exterior of the tank to resemble a coat of zimmerit. The thin resin is easy to cut with a knife or scissors and already shaped correctly for each part of the tank. I started with the rear hatch of the turret and then glued on the right side (closed side). I needed a lot of clamps to keep it in place, and still requires a bit of trimming along the edges. But this will be done once all the sheets are on and I have a better idea of what needs to be adjusted. The set also comes with a few resin replacement parts, such like the rear hatch and gun armour to fit to the front of the turret.
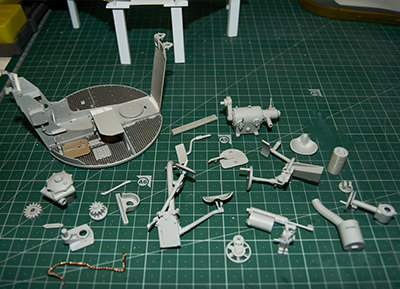
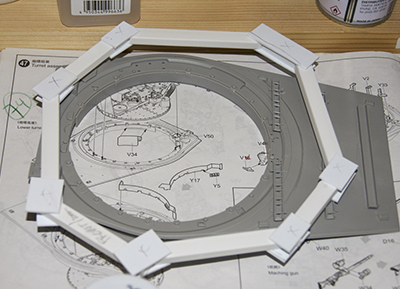
The next logical step (at least in my mind) would be to start work on the turret basket. This is where most of the crew would be working and houses the gun mechanism as well. A very complex system of many different parts that required a bit of work to make them fit properly. Although I was planning on adding quite a bit of details to it, having put it all together and placed in inside the tank, most will be hidden from view completely. So I decided not to and simply add details there where they’ll be seen. I added a cover to the floor of the basked with styrene sheet that fits around the PTO driveshaft and used copper wire to create the wiring for the firing mechanism. A few other small details like bolts and welds were added, too.
With all the sub-assemblies now done, it was time for some paint. Having learned from my previous mistake, I started by spraying all parts with Mr. Surfacer to act as a primer. This stuff is so easy to work with and is probably the best primer I’ve ever used. After a few minutes of drying I sprayed the hull red primer onto the basket itself before following with black on various parts and seats. I then let this dry for 48 hours (mainly because I went to work during this period) before masking the basket and spraying the ivory white paint. Being very comfortable with spraying matt colours, I still seem to struggle with gloss paint. The paint is watery (even with minimal thinning) and seems to run everywhere where I don’t want it. With a few thin layers in successive order, I’m reasonably happy with the result and once it’s dry I will follow with a matt varnish to kill the gloss (reason for using gloss is because it’s the only version I could get of the correct colour).
I also build a stand for the turret to sit on during construction to allow for the lower hanging basket once glued into position. This allows me to add all the small bits and the gun as well before placing the whole construction onto the lower hull of the tank.
And that’s where we are now. Once all the parts are painted I will add the final details and decals before putting it all together and call the basket complete. After all this I quickly put the main parts together and went to see if it actually fits in my display cabinet. Seems I’ve gotten my measurements right, thankfully.
Thanks for following and hopefully I will be able to post updates on a more regular basis now.
Return to Previous Page
Niek Nijsen Ltd.
Comp. Reg. (UK): 13778584
VAT. Reg. (UK): 398 4757 24
info@nieknijsen.com
Copyright
Niek Nijsen Ltd. © 2008 -
All Rights Reserved
Privacy Policy | Terms of Business