
The Final Push
Posted on August 22, 2019 by Niek Nijsen
Finally, after almost 3 years of work, I can call the King Tiger project complete. Despite all the delays and promises of regular updates, we’ve reached the finish line. And boy has it been a trip worth wile. And so, without further ado, I introduce to you the second last entry to this blog.
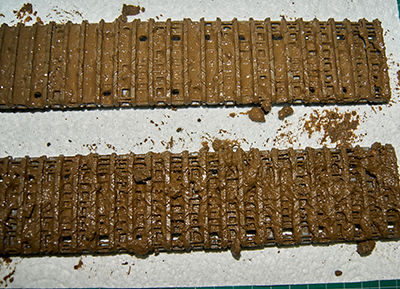
The next big step, which turned out to also be a very messy one, were the massive tracks for this monster. Measuring almost 90 cm (3 feet) in length, they had to be covered in mud before being able to add them to the model itself. For this I went into the garden and collected dirt, small twigs, leaves and some grass. All this was then mixed with PVA glue, water, and some pigments, before literally being dumped onto the tracks. I used a big brush to dab it on, making sure it would get into all the small openings and track links like it would do in real life. Once the first side was dry, a process I sped up using a hair dryer, the other side received the same treatment.
After letting them dry for a good time, I wrapped them around the wheels, not realizing the glue made it a lot harder to bend them. As a result, some of the mud cracked and came off, which I re-added with some glue afterwards. The bits of the track that weren’t covered with mud received some weathering using metal paints to make the tracks look less plastic and more metal.
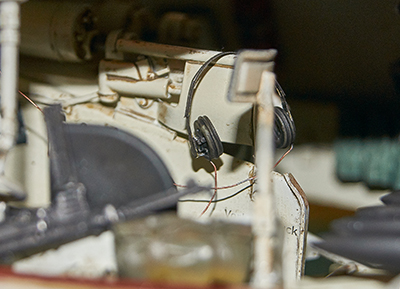
I focused my attention to the interior again and began work on the headsets. With only having 2 headsets for the model, I had to come up with an idea for the remaining 3 sets, which I wasn’t going to make from scratch. I figured that most of the crew members would nicely pack away their sets in the storage boxes when not in use (they’re German after all). All I had to do now was make the 2 sets that came with the Verlinden figures.
Each headset consists of earphones and a neckband which functions as a microphone. Both were made from various PE and resin parts, which after a bit of fiddling went together nicely. The wiring was made from 0.2 mm lead wire, which allows for a beautiful natural sagging once placed in the tank. Everything was painted and added to the gunner and commander’s positions.
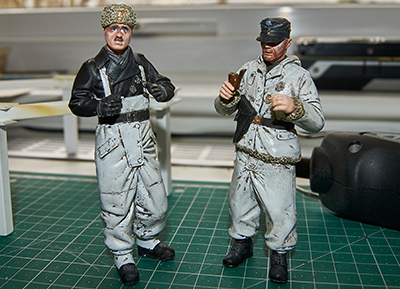
Now it was time to make the figures. Since both Verlinden sets were listed as “commander”, I bought a set containing various heads and swapped one of the two out with a different one wearing a wooly hat instead of a cap. I saw on photos of Tigers in colder climates that this was quite common. Since I didn’t really like the final look of the clothing on the commander, being all straight-cut, I used putty to add wool on the sleeves and jacket, creating a better-looking transition to the hands and trousers.
I began the paining process with a good clean of the resin parts, before spraying a thin coat of Mr. Surfacer on them as a primer and blending it all nicely together. I then sprayed both with MRP white (MRP-004) because the was the major colour used and the most difficult one to provide a good solid coverage with. All the other colours were acrylics by Vallejo and applied with a brush. I tried to follow various guides I found online, as I have pretty much zero experience painting figures. Different tones of black (for the clothing) and skin (faces) were created by mixing and used to achieve a natural looking figure. The leather-looking pouches were done using oil paints, brushed on un-thinned allowing it to create the streaking effect.
Although I think there’s still room for improvement (especially the eyes), I’m quite happy with how they turned out in the end.
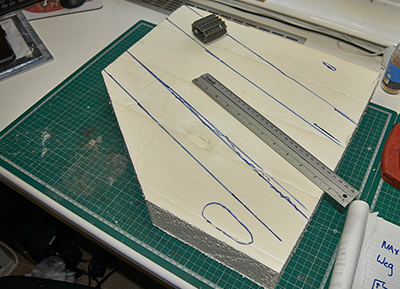
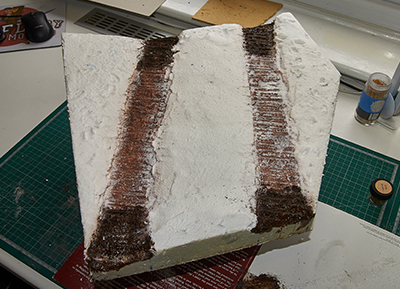
At this point, the model and figures were pretty much ready and all I needed was a base to place them on. I got myself a piece of insulation material, left over from the garage conversion, which provides a great medium for this. It’s basically tightly packed Styrofoam, which is perfect for shaping with sanders and the likes to form a basic shape. After cutting the piece to the required size and shape, I covered it with a thin layer of plaster. While this was drying, I added track marks using left-over links from the tank and the footmarks using one of the figures.
The tracks were airbrushed on using MRP (only colour I had laying around) while the darker mud effect was created using a combination of PVA glue with dark brown acrylic paint and pigments, hoping for a more wet look. The wet puddles were created using ‘Woodland Scenic Real Water Effects’, which was applied using a syringe.
The snow was added last, again using ‘Woodland Scenic’ products, by covering the entire base with a mixture of PVA glue and water, before sprinkling on the snow through a fine sieve. I then sprayed on a thinner version of the glue/water mixture using a spray bottle.
It was now time to bring it all together. The tank was added and glued into place. In an attempt to show of the size of this beast, I ended up with one track sticking out of the diorama base, hanging freely in the air. I think this gives a great dramatic effect to it all.
Unfortunately, the tank didn´t fit perfectly and some parts of the tracks were not touching the base. I corrected this error by applying PVA glue to fill the gaps and sprinkle snow onto it, creating the effect of a recent snow shower. This was followed by sprinkling snow all over the model, kept in place with a thin mixture of PVA/water which was brushed on in the desired places.
To complete the diorama, I made a signpost from scratch, using periodic photos to estimate the size. This was then made from balsa wood (pole) and styrene sheets (treaded with a rough sanding stick to give it a wood-like effect). Once glued together, I painted the whole thing with brown oil paint, again allowing the streaking effect to give it a more wood-like appearance.
The lettering was done freehand using white acrylic paint and a small brush. Granted the lettering isn’t perfectly straight, I figured this would have been done by locals in real life anyway, being in a remote location. The distances were achieved using Google Maps, so I challenge you to figure out where exactly the diorama is based.
Lastly, I added the figures to their spot in front of the tank and placed the few remaining bits around the tank to complete the look. The final touch was added by placing a map of the local area, made by scaling down an old map of the area to size, and placed into the hands of the crew members.
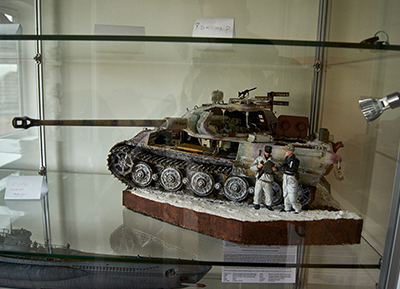
And there you have it, a completed Tiger Tank model. Although I was going to cover the sides of the diorama base with balsa wood initially, this didn’t work very well. Thanks to a good friend of mine who gave me a great idea, I covered the sides with brown paint instead. The idea behind this is that the whole thing has been “lifted” from the ground and placed in my display cabinet instead.
As I mentioned, this is the second-to-last blog entry for this model, as the last one will be done once I’ve received the engraved plate for it and the photos of the final model have been taken. So, until then, please enjoy the photos I’ve added to the gallery. As always, see you next time!
Return to Previous Page
Niek Nijsen Ltd.
Comp. Reg. (UK): 13778584
VAT. Reg. (UK): 398 4757 24
info@nieknijsen.com
Copyright
Niek Nijsen Ltd. © 2008 -
All Rights Reserved
Privacy Policy | Terms of Business