
Big Model, Big Update
Posted on December 08, 2015 by Niek Nijsen
It’s been a while since my last update on the King Tiger project, mainly because I’ve been building the F-16, which took longer than anticipated. Despite the slight setback, we’re back in business now! And there’s a long list of things I’ve done to follow.
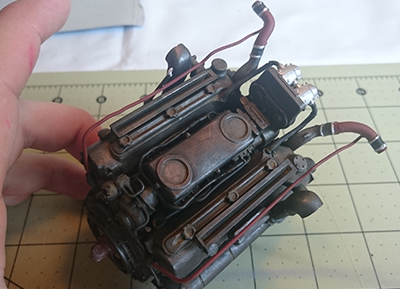
The engine was the first thing I continued working on. I’ve added the exhaust, carburettors and a lot of scratch build piping. The last was done because it would enhance the detail and reality of the whole engine, but also because quite a few plastic pipes broke during clean up. To prevent myself from spending too many hours on this, I decided to only add detail to the parts you can actually see. That means the piping is added to the top but not the bottom parts, and the same will be done with painting and weathering later on. Once the engine itself was put together, I finished the fans that go on top and put together a few other items that will be part of the engine assembly later on. Before painting, I wanted to be sure it still fits, so after a lot of wiggling and gently forcing it in place, the engine fitted in the space between the firewalls. Next up was painting the engine and its components. I started with a primer followed by a layer of black. I then tried my new buffable paint and painted the top half with it. This paint is special in a way that you can “buff” it, i.e. rub it with a cloth, to create a metallic effect. I’ve never used this before but the result is really good and makes the engine look almost real! Once I was happy with the amount of metallic shine, I painted the pipes and all the other details in various colours before starting the weathering process using pigments and washes. I don’t want to weather the engine (and most of the interior) too much as these tanks were relatively young compared to other tanks during the war. My subject for instance was only a year old. Now that the engine was finished it was time to move on to the firewalls.
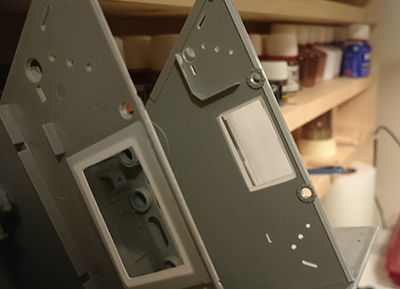
The firewalls are very accurately represented, if you’re building a panther tank. Sadly I wasn’t so I had to change a few things. The most obvious part was the connecting panel that links the engine and cooling fans together. I cut the old parts out and build a new one from scratch using plastic sheets and strips. Most of that will be done later on because it’s part of the cooling fan, which will be build later on.
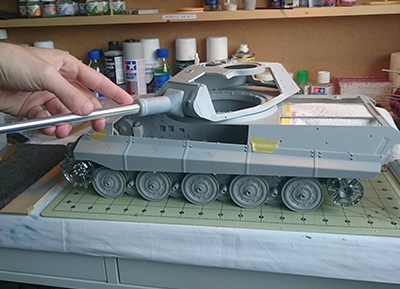
To make sure I would be happy with the sections I want to cut out before actually cutting them, I decided to put the tank somewhat together to get an idea of the final look once completed. Basically I’ll have most of the side cut out and a lot of the hatches open around the engine. That way you can see most if not all of the interior as well as the exterior. Not entirely sure yet of what the final diorama surroundings will look like, besides that it will be a snow scenery.
It seems not just the firewalls are based on the panther in this kit, the same goes for the fuel tanks and cooling fans. So I’ve changed these to match the King Tiger. The fuel tanks were made of a single tank, thus requiring me to fill the gap between the two tanks that came with the kit. I used plastic strips to roughly fill it before finishing it off with putty. Once sanded, the tank was fitted with straps that would have kept it in place in the real machine. Then the process was repeated for the right side tank. The fans are actually pretty good, although the adjustable opening vanes will need some work. In regards to the fans, all I did was flatten one of the radiators with putty. For some reason they used two different types in the real machine, so now mine does too.
Before cutting the plastic hull and stopping myself from making any changes, I put as many completed parts as I could inside the model to see what it will look like with everything in place. The clear cover is really helping with this since it allows me to simply change things until I’m satisfied, only thing I’m not sure about is the amount of light I’ll eventually have because the clear is letting through a lot more than the grey plastic will. But I’m pretty happy with the way I have it now, so the next step will be to transfer this to the plastic version and start cutting.
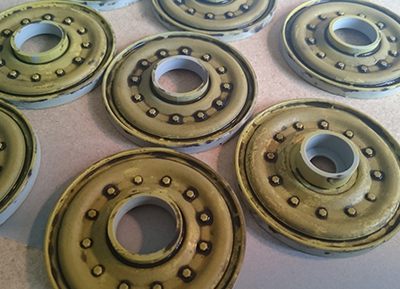
After sniffing glue for so long, it was time for something stronger and I began spraying the wheels. Since the wheels will be put together, I won’t be able to paint the insides anymore, so I had to do this before gluing them. After debating which colour to go for, I sprayed them dark tan yellow before finishing off with a dirty brown wash to weather them. I’m very happy with the result, although you can’t really see much of it anymore.
By now I put most of the interior parts that didn’t require adjusting together, so it was time to cut the grey plastic hull. I transferred the layout from the clear version using masking tape and once I was happy with that, I took out the dremel and started cutting. Once the rough outline was done, I finished the openings by sanding it all nice and smooth using different types of sanding sticks.
Now that I cut out the openings in the hull, it became apparent that the thickness was nowhere near the actual armoured plates it would have had in real life. So after measuring and converting figures to my scale, I added plastic sheets on the inside of the hull around the openings to recreate the thickness. I then filled any gaps with putty before sanding it smooth. These edges will eventually be painted in a dark red colour I think to highlight the fact that the hull is actually cut open and not resembling the real thing (a bit like you see when they open up a vehicle or engine in a museum).
Getting addicted to the smell of paint I began spraying the engine compartment and all it’s associated parts in the standard brown/red primer colour the Germans used for their vehicles during the war. This will be further enhanced by washes and weathering once I’ve sprayed the rest of the interior as well. But for now it’ll be covered up with kitchen towel while I finish the interior parts.
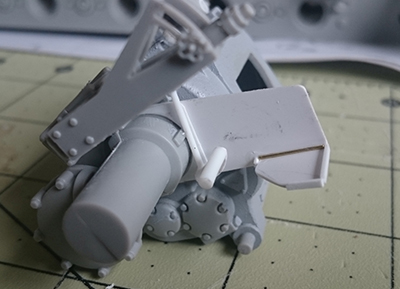
To give myself a little break from the lower half of the tank and get a feel for the actual size of it once completed, I began working on the gun assembly. It’s basically a large plastic puzzle with a massive aluminium pipe sticking out of it. Only then did I realize the massive size of this kit, simply enormous! Guess that explains why I had to order a bespoke display cabinet for it, won’t fit in anything else… I cut all the parts from the sprues and cleaned them up. I managed to put a few parts together, but soon realized I needed to buy some different type of putty to recreate all the welds. So back to ebay and spending more cash on this kit. Starting to get pretty expensive…
With the gun on a hold, I had to look for something else that I could put together, and decided the turret ring could use some attention. The biggest problem with this, and I read a lot about it online, is the fact that the upper half of the tank doesn’t fit on the lower half. So, what to do? Well I started by gently sanding the inner ring of the turret floor to make it thinner. But after sanding for what seemed like hours (think it was close to 30 minutes) I decided that wasn’t working at all. When I tried fitting it again, I noticed the ring wasn’t even visible, no matter which way you looked at it. Which meant that in my frustrated state, I simply took out the dremel multi-tool and started cutting the whole thing away. Now it fits nicely.
In order to make the tank resemble a home for its crew, I went on the internet and started looking for photos of German soldiers and their families. I quickly found a couple of good looking ones and converted them to scale using Photoshop before printing them. I did the same to end up with a map of Hungary, which will be placed in the commander’s hands once the diorama is complete. I will also add a magazine and newspaper to add some realism to the model.
Another area that required quite some work is that of the driver. A lot has been done to the gearbox already, but the seat and throttle linkage were still far from good. The linkage was build from scratch using plastic strips to create a cover and linkage, while using metal rods for in between the parts. Although it’s not exactly the way it would have looked in real life, I’m pretty happy with how it turned out. Besides, most of it will be covered by a floor plate and seat anyway. The accelerator pedal was way too small and required one build from scratch as well. I used one of the resin feet from the commander to measure the size of it before constructing it from styrene sheets. With all the parts covering it once completed, you can hardly see it’s a little too big. Let’s just say the driver has heavy feet, requiring a sturdy pedal… The driver’s seat is made of two parts of plastic, which looks absolutely ridiculous and nowhere near the real thing. So after ditching them in the nearest bin, I made one from plastic tubes and recreated the seat cushions from putty. The only thing left to do is add the spring coils to the back, which will be made from copper wire later on.
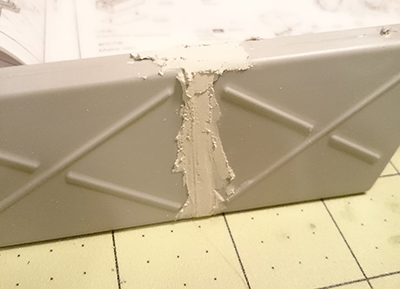
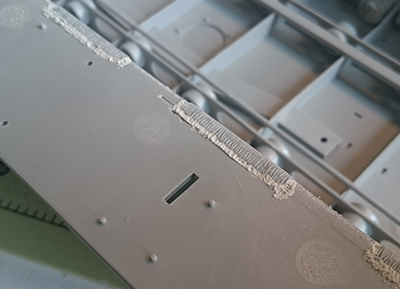
The lower hull was put together like a jigsaw puzzle and would have had large torch cuts and weld seams on it. But the model didn’t really portrait these very well, so I cut 1mm trenches around the torch cuts before filling them with putty from a syringe, creating the weld seams. The torch cuts were made using a soldering iron with a thin tip and dragging them over the plastic very gently. A lightly sanded them afterwards to get a more scale effect.
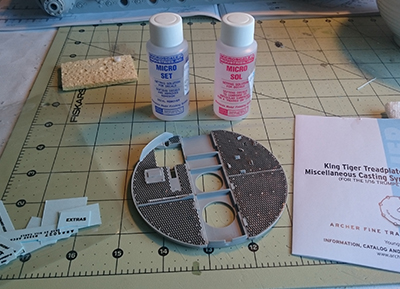
The gearbox would have had a secondary acceleration pedal for the driver if he were seated on the raised chair, allowing him to look outside through the hatch. But this part was completely missing from the kit, so had to be build from scratch as well. Using photos from the real machine and the model build by David Parker, I used styrene sheets and strips to make the part myself. Once the pedal was complete, I also added another layer of the primer/sanding dust mix to get the cast iron effect. Once that was dry I enhanced the gearbox with a casting number, which is made of a decal with raised letters/numbers.
Another thing that was missing from the kit is the flashlight, located left of the driver’s seat behind the suspension. I made this using a piece of the weapons that came with the Hind model and added styrene covers to the top and bottom to seal the canister. The frame to hold it in place was also made of styrene and a brass strip to secure it.
The interior of the tank was filled with weapons and ammo. Besides the ammo shells for the gun, the rest is all missing. So I ordered ammo pouches online and weapons for the crew as well. These will be added later on once the interior is finished, but I did add a rail to hold the pouches on the driver’s side. It’s basically a u-shaped plastic strip glued in place with putty to resemble welding seams.
The King Tiger carried a lot of spare periscopes inside and these were positioned in special brackets mounted on the interior walls. The ones that came with the kit as part of the lower hull didn’t look right at all and I sanded them off early on. The new ones were made using a spare periscope to size it up and then put together using plastic strips.
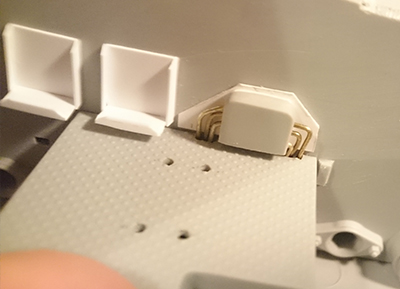
The latest addition to the model is the new junction box I made by reshaping a different part (I think it was a box or something similar from a different kit) and added the wiring using copper wire that comes out the side. The box was actually moulded into the hull during the production process, but I didn’t like this one very much and removed it as I did with the periscope brackets.
And that’s it… for now. I’m back in business when it comes to building this amazing model and will receive my full attention until finished. So expect more blog updates and photos soon as I progress with the interior and start painting it all very soon. Until then, enjoy the photos that show you all the things mentioned above and as always, until next time!
Return to Previous Page
Niek Nijsen Ltd.
Comp. Reg. (UK): 13778584
VAT. Reg. (UK): 398 4757 24
info@nieknijsen.com
Copyright
Niek Nijsen Ltd. © 2008 -
All Rights Reserved
Privacy Policy | Terms of Business