
A Major Milestone
Posted on October 24, 2017 by Niek Nijsen
Finally, after more than 2 years building this model, I’ve finished the interior and closed up the hull and turret. But let’s go back somewhat to the part where I get all the subassemblies ready.
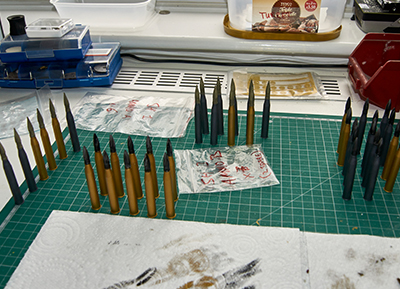
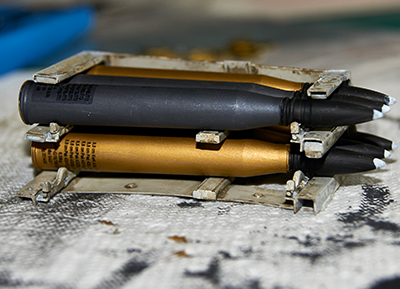
It all began with the tedious and somewhat boring task of sanding all the ammo shells. It took me around 2 hours to get all 40 of them looking smooth. While reading up on the rounds used in the King Tiger, I found out that towards the end of the war, the brass shells were going out of fashion (more likely because of brass becoming a scarce material) and treated steel was used instead. But figuring they would have had at least a few old ones laying around, I went with a combination of the 2 for my load-out. To paint the shell casings, I used Mr. Metal Color brass & iron, which were then buffed to give a metallic look. The scratches were actually created (more by accident) during the handling and placing them in the racks. As they turned out very realistic, I left them this way. The actual shell was painted using acrylics, simply because I used a brush for all of it instead of the airbrush. The colours used were black and olive drab by LifeColor. The white tip was created by dipping them in the lid of the bottle with some paint in it. After the paint had sufficient time to dry, I added various decals. For whatever reason, Trumpeter only provides decals for half of the shells, which normally wouldn’t be a problem as the hull is closed up. But with me opening it all to the viewer, I had to position them in such a way that all the front shells, visible to you, had a decal on them. The bottom was glued on last, with a quick flick of the paintbrush to match the shell’s colour.
Now came the time to place all of the shells in the racks. Unfortunately, the resin parts were slightly warped, so the shells went in a bit difficult at times as they had to bend the resin to shape. Some were so bad I had to leave shells out in order to make them fit in the hull. Eventually, after a lot of fiddling around, the racks were loaded and fitted to their respective places in the tank.
Carrying ammo for the big gun is one thing, but the crew also had to take rounds for their MGs with them. The bags were hung up anywhere they could, although most of them hung on specialised rails on the hull roof and turret ring. Bags were added to the side of the loader’s seat as well. It’s getting very crowded inside and I can hardly imagine what it would’ve be like to live in these machines for months on end.
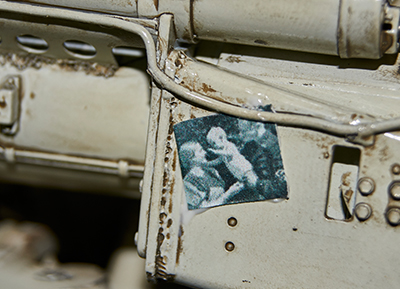
With the above in mind, I’m convinced the crew would have personal items with them, with the minimal being photos of their families back home. I went onto the web and found myself some photos of German crews and soldiers with their families. These were scaled down to the correct size and then printed. I then glued them in place at each of the crew stations. Trying to make it more realistic, I placed them behind wiring, instruments or parts of the tank, as if they were stuck there by the crew.
Now came the moment of truth, merging the hull roof with the lower hull structure. I already knew this wasn’t going to be a perfect fit, nowhere near to be honest. This is mostly because the bottom half was sagging a little, and the top half was missing some of the side as I sanded off too much to make the added armour fit. Another problem, even before gluing the roof in place, was the positioning of the radio assembly. With the support structures in place, I couldn’t glue it to the roof, as it won’t slide into position. The solution was sliding the roof halfway down, then wiggle the radio set around the fan assembly and in between the support strut and gearbox, before sliding the roof into its final position. All this had to happen relatively quickly, as otherwise the glue would dry before things got to where they’re supposed to go. In the end, it all worked out quite well and the whole assembly slotted in place nicely. Clamps were attached to keep it there until the glue hardened.
I hear you thinking, what about to gaps due to the sagging? Yes, that was the next step. The left side, the one which is opened, was filled with putty, whereas the right side was filled with your standard hobby glue. The only bit that was filled with putty on that side was the rear end, since I’ll be removing part of the track covers, the rest will all be hidden. Lastly the putty was sanded down to the correct shape, which completed the whole process.
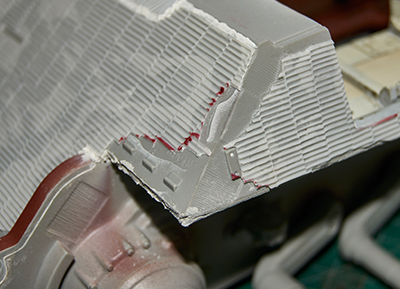
The turret had already been fitted with all the zimmerit sheets, but the lower half hadn’t. To fit the hull, I had to slightly modify them, as the openings didn’t line up perfectly. More work was required for the left side with the large opening, but this didn’t cause any problems in the end. Before gluing them in place with CA glue, I cut parts of them to add damage to the coat. This was then further trimmed once in place to create a more realistic effect.
Back to the upper office, as there was still work to be done here before I could close her up. I started by adding the shells. In the Porsche version, they were held in place with straps. I tried to recreate this by flattening lead-wire which was then bent to shape and glued in place. I am aware that the actual buckles are missing, but I wasn’t able to recreate these very accurately, so I opted to leave them out altogether. The crew working in this part of the tank also received photos of their family, which were placed in, hopefully, logical and realistic places. Shame some of them will be very difficult to see once it’s all finished, but then again it provides the viewer with new details each time they look. And that’s what I’m going for in my builds. Although the tank is equipped with a massive gun, I’m convinced the crew would be carrying personal protection as well. I bought the weapon and accessories set by Dragon and selected the items that I wanted to add. These were painted and glued in place. The set consisted of an MP-40, ammo bags, some hand grenades, a sleeping bag, and a small rucksack of sorts. I think all these small items bring more life to the model and make it more realistic. The commander’s hatch finally received the last parts that had been missing for all this time. These were the periscopes and accompanying mounting brackets. They were all painted in MRP’s NATO black. The photos were added afterwards to complete the turret interior.
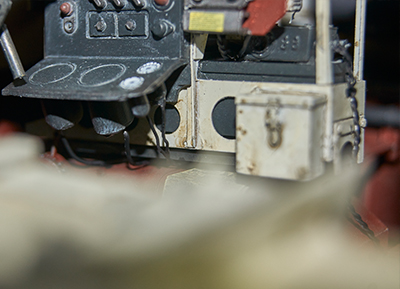
There was this one little thing I completely forgot about. At first, I thought this could be done before fitting the unit, but due to me changing the procedure of fitting it to the tank, it was no longer possible. You guessed it right, I’m talking about wiring up the radios. The only way I could access them at this point, was through the little hatch which allows the radio-operator access to the tank. A massive pain to get this done, if at all possible. After a lot of head scratching, I decided that most of it won’t be visible in the end anyway, especially with the way the tank will be positioned in the final diorama. Instead, I added all the wiring to the driver’s side, which are clearly visible. These then ran underneath the radios and disappeared hanging over the gearbox underneath. Multiple lead-wires were twisted together to form the power cables coming from the communication box that run to the right side and disappear in the box behind the radio-operator’s seat. In order to do all this, I had to remove the oil tank, which was later glued back in place.
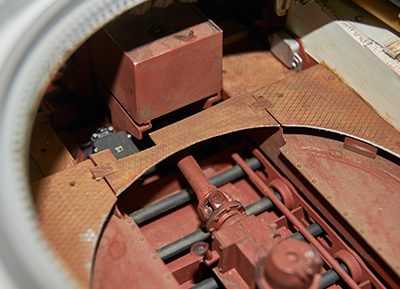
Up to this point I wasn’t sure whether adding the missing floor-plate was going to make a huge difference, but when dry-fitting the turret and the basket, I noticed this was the case. The gap was measured and cut from plastic seat with the diamond-shaped pattern on it. The curve was created by simply placing it underneath the basket and trace the curvature of it. It was then painted and weathered to match the rest of the floor. A small job but a big presence in the model.
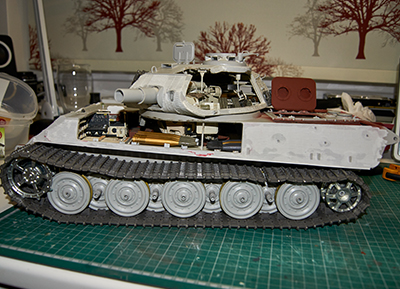
The moment had arrived, where the turret was finally merged with the hull. Although this will remain a loose fit, I wanted to see what it would look like once completed. I added all the wheels to the already massive kit and wrapped the tracks around them. The barrel was fitted and the engine covers followed next. This is, by far, going to be the biggest model I’ve ever done to date, and it looks mighty impressive already! Not to mention the weight, this thing is heavy!
I know I promised a new time-lapse video in my last update, but I’ve been having issues with the camera, causing it to stop midway recordings. I haven’t been able to fix the problem yet, and I’m considering getting a new camera for this. So far, I’ve lost at least 20 hours of work, so I need to have a good think about how to continue with this project for the Tiger Tank. I might call it quits and try again with the next build. What do you think I should do?
Once again, many thanks for sticking with me during this build and all your comments! They really keep me going when things get less exiting. But the end is slowly coming in sight, and I’m really motivated for the final push to get her ready for some paint! Sadly, I’m away for the next 7 weeks for work, but lots more will be done in December. See you then!
Return to Previous Page

Niek Nijsen Ltd.
Comp. Reg. (UK): 13778584
VAT. Reg. (UK): 398 4757 24
info@nieknijsen.com
Copyright
Niek Nijsen Ltd. © 2008 -
All Rights Reserved
Privacy Policy | Terms of Business