
Stripped bare
Posted on August 14, 2020 by Niek Nijsen
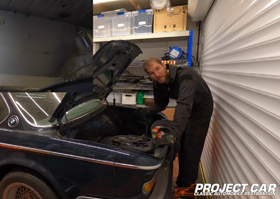
We ended last month with a bit of a cliff-hanger as I was waiting for the new tools to arrive. I’m happy to report they have been delivered and they’re the right size. The new 36mm socket allowed me to rotate the crankshaft from the front of the engine, which meant I now had access to the 4 bolts that keep the automatic transmission attached to the engine block. It’s a very small workspace and it’s actually recommended to remove these bolts while the engine and gearbox are still attached to the car, where you’ll have easier access to them. Hindsight is a beautiful thing, isn't it? Eventually I got the bolts removed and the gearbox was now free to be separated from the engine. I thought I drained all the fluid, but it turned out the torque converter (a big drum-shaped part that sits between the gearbox and engine) was still completely full. So, when I finally came to pull the two apart, the floor was covered in oil… Great, another 30 minutes and half a blue-roll well spent on cleaning up the mess.
Anyway, now that the gearbox was out of the way, I could shift my attention to getting the engine mounted to the stand. Easier said than done. For some reason the crane and stand didn’t like each other much and I had to position the engine in all kinds of weird positions in order to get it mounted properly. The problem originated in the difference in width between the legs of the engine stand and those of the crane, the first being about 2 cm wider. I think I spent about 2 hours or so doing this and I’m sure it’ll all be available for your entertainment in a future episode. Having said that, the engine did eventually align with the stand properly and got it mounted. The oil was drained, and the engine stored aside for the time being. As I'm not sure an engine stand is designed for (long-term) storage of the engine, I've also supported the block by positioning a wooden beam underneath the engine mount. So far it seems to be holding well.
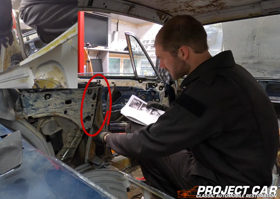
With the engine out of the way, attention shifted to the front of the car. Not a lot left to do here, as most items were already missing, aside from a single headlight and some left-over wiring. Both were quickly removed which was quickly follwed by the removal of the remaining chrome strip and the BMW badge. And that pretty much concluded the stripping of the entire car. All I’ve got to do now is remove the front and rear windscreens, something I’ll be doing at the end of the month.
The final bit of big news is that the car is booked in for the chem bath, in which all paint and rust will be stripped from the body. Hopefully there’s some left of her by the time she’s coming back. Then the fun will begin of repairing the metal work and putting in all the modifications. I’m currently in the process of sourcing a roll cage and a few other items that are still on the to-do list. The plan is to provide you with more details on that in the next update.
In the meantime, you will have noticed the next episode is available on YouTube and the website. In the three that have been uploaded since the last update, we’re clearing out the boot/trunk (episode 06), remove the door trim (episode 07) and remove the side windows (episode 08 - well worth a watch). This Sunday will have another episode for you, in which we’re taking out the door locks, remove the doors themselves and tidy up the few remaining interior items. Visit the "Project C.A.R.™" page for easy viewing of all these epidsodes.
And that’s it for this update. Hopefully you'll enjoy the new episodes and as always please leave your feedback, comments and suggestions! Don’t forget to subscribe if you haven’t already, thank you! See you next time!
Return to Previous Page

Niek Nijsen Ltd.
Comp. Reg. (UK): 13778584
VAT. Reg. (UK): 398 4757 24
info@nieknijsen.com
Copyright
Niek Nijsen Ltd. © 2008 -
All Rights Reserved
Privacy Policy | Terms of Business