
And we're off!
Posted on May 31, 2020 by Niek Nijsen
It’s been a very busy month! Not only did Project C.A.R.™ get a new home on the website, Brünhilda is looking very different than a month ago. Let’s have a look at what I’ve been up to.
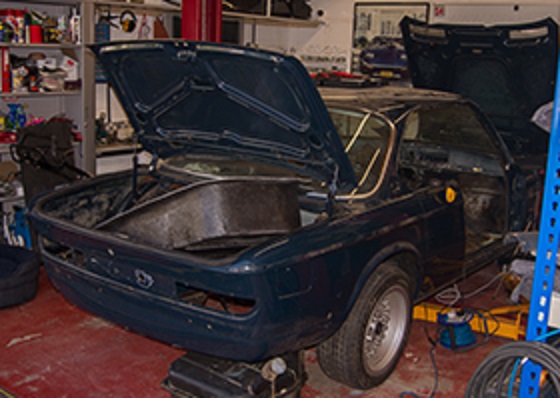
Last time we ended with the boot and removal of the tank. In the meantime I’ve received a new “boot box”, which is basically a large tray/bathtub made of fiberglass that replaces the spare wheel and fuel tank space. This was used in race cars to allow for custom fuel tanks, oil reservoirs and more. More details on this will come when I get to cutting out the floor to make this fit. Since I won’t be using the fuel tank anymore, if anyone who’s interested in a ’74 second hand tank, please get in touch with me.
Included in the same order was a new dashboard, the GP2 race car version (also fiberglass). This will replace the original dashboard, as I’m going with a more rally / race car look to the car, especially since we’re adding bucket seats and a roll cage, might as well stick to the theme and go the whole way.
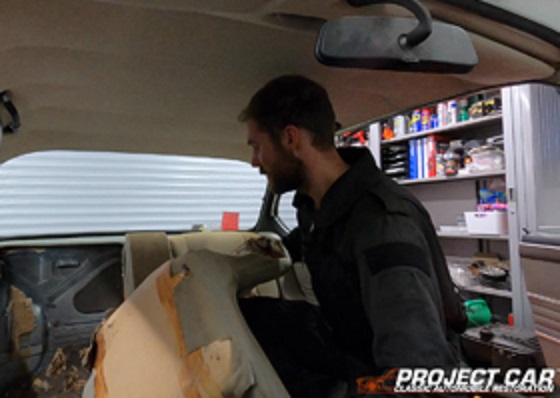
Now let’s have a look at the work that’s been done since the previous update. The dash had already been removed, as were the seats and carpet. So I was basically left with an empty space still surrounded by door liners, headliners, windows and various small items. Time to get them out. First up were the door liners, which came off pretty easy once all the door handles, knobs and switches were removed. All of this will obviously be covered in detail in future episodes on Project C.A.R.™.
I shifted my attention to what was above my head and began the process of removing the headliner. Now, I’m still not sure whether the mice eat the foam here as well (wouldn’t be surprised) or if it’s simply decayed this badly after 45 years. It was basically snowing foam every time I removed another piece of liner. Heck, I ended up filling 2 bags in the vacuum cleaner to give you an idea of the mess…
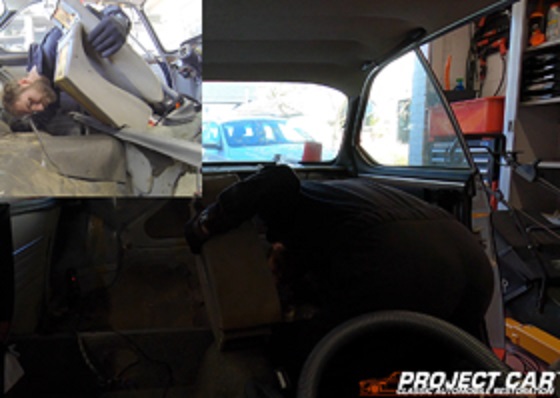
With the interior stripped bare, I got access to the window mechanisms. I instantly ran into problems, as my windows are of a later version/design than explained in the manual (which turned out to be of little use once again). The rear windows are relatively straight forward, although I had to lower them in order to get them out. Another problem, as I’d already disconnected the wiring. Luckily, I have a handy tool, called the Power Probe, which allows me to power individual parts of the car, so I could lower the electric windows in the back.
The front door turned out to be an even bigger problem. The manual is very good in explaining how to remove the lock and door handle, but you can only get to them once the window is out. A bit of research was required and other than that I more or less guessed from a logic approach as what might be the best way to get them out. After a lot of frustration, I eventually got them out and quickly followed with removing locks and handles.
Since the doors have been in my way quite a bit, and they’ll have to be removed from the body for the chem bath process later on, I decided to take them off. The left door was straight forward, undo a couple (read 6) of bolts and the door comes off. The right side however, bloody nightmare. One of the bolts was completely rounded so there was no way that would come out using sockets or any other wrench-type tool. Add to the problem that it’s sunk into the door with very limited access. I ended up buying a bolt extractor set which solved the problem. Basically what this tool does is it “grips” onto the head of the bolt with a set of “teeth” and then provides the necessary force/grip to loosen the bolt. Anyway, now with this little “pain in the behind” removed, his 5 little friends were quite happy to follow and this door was also separated from the car.
At this point I had enough of the interior, especially since the next job would be that of removing the sound insulation that is glued to the floor panels. But we’ll get to that in a second, first we’re going to move forward a bit, literally.
The engine bay was screaming for attention and who am I not to give it? The first step was to create some space to work, so I removed the coolant reservoir, various hoses and wiring. This was followed by the removal of the brake fluid reservoir, additional oil filter and washer fluid tank. At this point my dad made a very valid point, in that if we are to replace the current carburetors with triple Webers, we better get the fitted before we remove the engine. Can you imagine the car being in the final stages of assembly and it turns out the engine no longer fits?! Yeah, exactly. So, instead I removed the original carburetors (twin Zenith’s) and the hoses & wiring that go with them. While working on the wiring, I decided to remove the whole lot. Pretty straight forward really as you simply follow the loom from back to front as you pull it back to the center area underneath the steering wheel. Unfortunately, I had to make one cut in the loom due to the way we re-routed/taped during the previous restoration work as there was no way it would come out past the bulkhead. The front section which wires the headlights, indicators, horns and a few other things is still there as I can’t access the front of the car at the moment, this will follow later.
The next step will be to remove the exhaust manifold, since they’ll be replaced by a sport version as well. Again, the idea here is to make sure it fits and to see if any additional structural work is required before removing the engine.
You may have noticed I’ve added two new episodes to the Project C.A.R.™ series on the website and YouTube which cover the removal of the seats and carpet split over 2 episodes. Now that I finally made enough of a head start and got sufficient footage, I’ll be uploading a new episode every 2 weeks, with the next one coming on Sunday (in which we’ll start work on the dashboard).
I’m sure you’re pleased to know you’ve (finally) reached the end of this update. If you haven’t already , go checkout the latest episodes and subscribe to the channel. I look forward to read you comments and feedback you may have. See you at the next update!
Return to Previous Page

Niek Nijsen Ltd.
Comp. Reg. (UK): 13778584
VAT. Reg. (UK): 398 4757 24
info@nieknijsen.com
Copyright
Niek Nijsen Ltd. © 2008 -
All Rights Reserved
Privacy Policy | Terms of Business