
A lengthy catch-up indeed
Posted on March 23, 2022 by Niek Nijsen
You’re absolutely right, it’s time we have a catch-up on what’s been going on with Brünhilda and the restoration. So, pull in a chair and get yourself comfortable, it’s going to be a lengthy one.
The long silence is something that wasn't planned for, yet somehow it seems that uploading a quick photo to Instagram goes a lot quicker than writing a full update in text format. Combine that with the new family life situation I find myself in and we’re slowly creeping towards that silence I just mentioned. With the car still being in the body shop (more on that in a bit) and not a lot else left to do in the garage, motivation to write an update was probably not at the top of my list. That doesn’t mean you don’t deserve one, most certainly not. Let’s crack on with it and give you the full story.
First, I’ve now finally completed the mini-Brünhilda car for my daughter. In the last update I was still halfway the paint stage. Since then, I’ve covered the primer with a beautiful coat of “Atlantik Blau” which already made it look a lot more like the real car. I subsequently painted all the chrome details, some of which have been created from scratch as the mould didn't provide for it. Lastly, the car was covered in a final gloss varnish coat to seal and protect all the previous paintwork. Once that was dry, I added the stickers I designed, including the number plates, BMW logos, and the name tag. The wheels were also slightly changed and are now looking more like the real thing. All that remained now was to present the finished product to my daughter on her 1st birthday. And from her first reactions, I think it’s been a success!
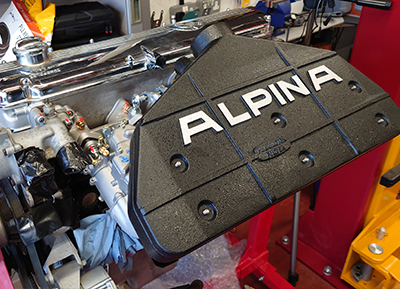
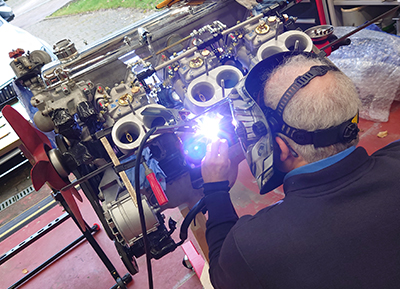
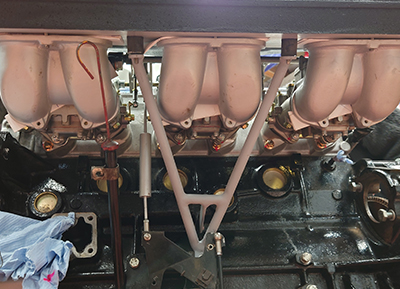
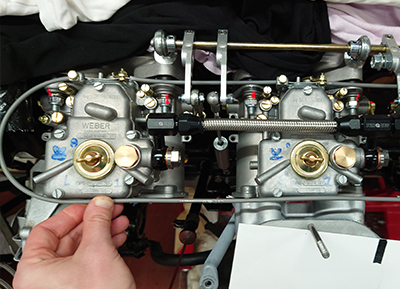
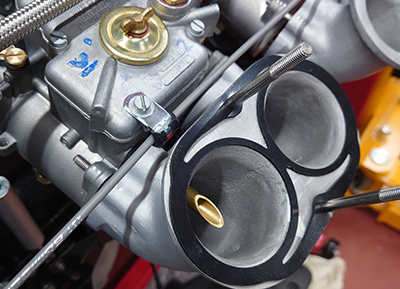
Let’s get back to the real car, because somehow, I think that’s why you’re really here. As the bodyshell is still in the workshop, there isn’t a lot left in the garage to work on. You may have noticed I’ve been posting photos of the engine block, one of the few items still accessible. I’ve changed my original plan of using a “modern aftermarket” style airbox for a replica of the original Alpina airbox. Why a replica you might wonder? Well, primarily because of the ridiculous cost of an original (think over 10k ridiculous). Secondly, because an original isn’t available. Either way, this than meant the carburettors would be supporting a lot more weight, as the Alpina airbox is a lot heavier than what I was planning on using initially. To stop the weight in combination with vibrations taking their toll on the carburettor inlet manifold mounts (I know, that’s a mouthful), it was decided to manufacture a custom support brace that would sit underneath it and attaches to the bottom of the engine block, behind the mount for the accelerator linkage. Hopefully the photos explain it better than my words. Once finished, the brace was blasted and powder coated in matt black, and will be fixed in place on my next return home later this week. I also want to use the choke function of the carbs, for which I purchased a bicycle brake line (thinner than a standard choke/Bowden cable) and installed this, linking all three carbs together to be controlled from one single point inside the cabin. Lastly, to ensure a perfect seal between the various components, custom gaskets were designed and made which I’ll be installing soon to complete the airbox section of the engine. There’s still plenty of work left to do before she’s ready to go back into the car though, so stay tuned. I have many more parts making their way to me as I write this.
The rear subframe was also still available in the garage and has been something I’ve been putting off for a little while now. My first attempt at blasting the parts didn’t go all too well as they were a bit too big for the booth. I finally managed to find an address who could deal with them properly and last week dropped the parts off to be processed. They’ll be shot-blasting them, before giving them an “e-coat” like the rest of the bodyshell, which will then be followed by a gloss-black powder coating. Should look very smart when it’s done and more importantly will be properly protected against the harsh environment, in which I’ll most likely find myself driving the car. The next step will be the assembly of the subframe, including all the new rubbers I’ve received and upgraded springs and shock absorbers. All of this will be covered in an upcoming episode of Project C.A.R.™.
While I was blasting and powder coating the engine frame, I also brought along various parts of the rear window mechanisms and window wipers. All which are now looking brand new in their matt black appearance and are ready to be assembled and installed again. Meanwhile, new rubbers have been ordered and arrived from W&N in Germany. Although most of these parts will never be seen again once the interior trim is back in, I wanted to make sure they’d be protected against damp and water, as previously they have been suffering a bit from light rust. Like the rear subframe, the assembly and installation will also be covered in future episodes.
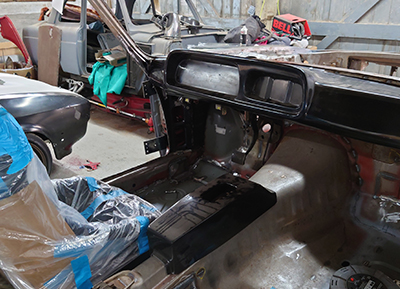
Now then, let’s talk about the magical bodyshell, the unicorn that nobody believes even exists. Heck, even I sometimes doubt this car I’ve been talking about for the last year is even real. But it is, and the guys at Competition Classics are doing a thorough job of restoring and modifying her to my specifications. It’s been a very labour intensive and time-consuming job, but I can finally say we’re almost at the end of the process. All of the rust that was found on the shell has been carefully cut out and replaced with either new panels or hand-made replacements depending on their availability. Many hours have been put into seam welding the entire car to make sure she’s stronger than ever before. The roll cage has been fitted and modified to allow use of the rear seat (strapping my daughter to the roll cage was frowned upon so in the end not a real option) and the boot has been braced and modified to fit the new long-range fuel tank. Seat mounts have been welded in place to allow the use of the new bucket seats and new jack points have been added in the centre of the car on both sides. I’ll provide you with a proper tour of all the modifications once the car is back in the garage. Currently, the car is about to be transferred to the paint shop for her e-coat and primer treatment before then receiving underbody protection. Once that’s all done, she’ll be on the trailer again making her way home, which will hopefully be by the end of next month.
That leaves me with a quick update on what’s been going on at the video-side of things. Over the last few months, I’ve slowly and sporadically been adding episodes to the series as I went along. I’ve still got a few waiting to be edited and uploaded, but so far you will have seen more work on the engine and the wiring design along with various progress shots of the bodyshell through the social media channels. As briefly mentioned in the previous paragraph, I’ll be creating more quality content in the next few weeks when I’ll be assembling the rear subframe and windows again. This will also be the first time we’re actually putting things back together instead of ripping them apart.
With all that excitement coming your way, don’t forget to subscribe to the newsletter and social media platforms and I’ll hopefully see you again in a few weeks’ time with more on Brünhilda. See you then!
Return to Previous Page
Niek Nijsen Ltd.
Comp. Reg. (UK): 13778584
VAT. Reg. (UK): 398 4757 24
info@nieknijsen.com
Copyright
Niek Nijsen Ltd. © 2008 -
All Rights Reserved
Privacy Policy | Terms of Business