
108 Pages, so far
Posted on August 01, 2020 by Niek Nijsen
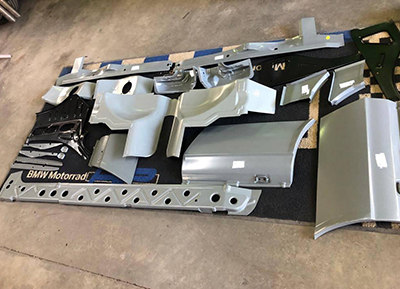
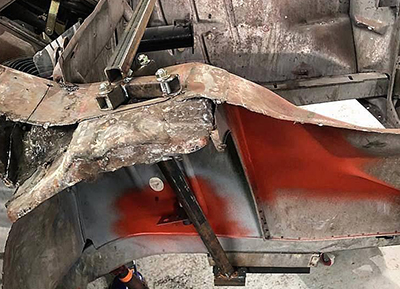
You’ll be pleased to know that this update is going to be shorter than the previous one, as the car is still being worked on in the body shop and in the meantime there’s not a whole lot I can do. New panels have been ordered to basically replace the entire front end, aside from the bumper and grill (and a few other bits). It’s a lengthy and costly process, but more than worth it when finished. Hopefully I’ll be able to provide you with a more detailed update on the progress not too far from now.
Since last time I’ve received some of the gaskets by post so that I could continue work on the engine, in particular the carburetors. They’ve now been mounted to the engine block, along with the new spacer for the thermostat housing. It all fits really nicely and I’m already loving the new look of it! Sadly, I’ll have to take them all off again as I’ve used the wrong nuts – standard nyloc doesn’t work as the heat of the block will destroy the locking part of these nuts. Instead, I’ll be using copper versions which are currently on order. Once fitted, I can mark everything again with the torque seal as shown in earlier photos. This is a technique used by the engineers at work on the aircraft and it allows you to instantly spot any loose nuts or bolts without having to re-torque them all. However, that’s as much as I can say for now, as I don’t spend a lot of time in the garage now that I’ve got a 6-month-old daughter…
You’ve probably seen the latest change in episodes, in that I have decided to provide you with quality videos instead of simply uploading something every 2 weeks with not a lot of substance to it. So the latest episode covers the design process of the new wiring loom, which is coming along nicely. It’s a lot of work but very motivating at the same time, knowing I’m making something completely unique and that can be found in my car only. This does bring its problems with it as well, in that it’s the only one out there, with nothing to compare it to or test it with. Which brings me to the next thing I’ve been working on quietly in the background.
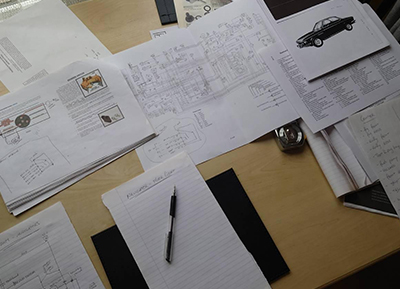
With all the custom items in this car, I’ve decided to write my own “manual/owner’s guide” on the car. It will include all the schematics for each of the wiring sections, along with many extracts from various manuals and books that will proof useful later on if I run into any issues with the car during rallies. So far, I’ve already got 108 pages and there are many more pages to be written.
I’ve been working on the pedal car in the meantime and the mini version of Brünhilda is coming along nicely. Because of the material it’s made of (polypropylene) I’ve been sending the top layer in the hope to remove the “grease” coat that’s applied during the production process. The problem with this coat is that it doesn’t adhere any paint to it. The other option is called “flaming”, simply heating the product to the point it evaporates. The downside to this, however, is that I can easily melt the product and deform it in the process… So, instead I opted for the sanding route. Not sure if this is just as good but it seems that after many hours, the primer does adhere to it. Fingers crossed it stays that way and I can apply the top colour soon (I still have to find an address that can match the original BMW 041 Atlantic Blue). More on that hopefully soon!
And that’s it for this blog update. In the meantime I’ll keep posting on my Instagram account with photos and updates so make sure you follow E9Brunhilda if you haven’t already.
Return to Previous Page
Niek Nijsen Ltd.
Comp. Reg. (UK): 13778584
VAT. Reg. (UK): 398 4757 24
info@nieknijsen.com
Copyright
Niek Nijsen Ltd. © 2008 -
All Rights Reserved
Privacy Policy | Terms of Business