Nearly There
Posted on April 30, 2020 by Niek Nijsen
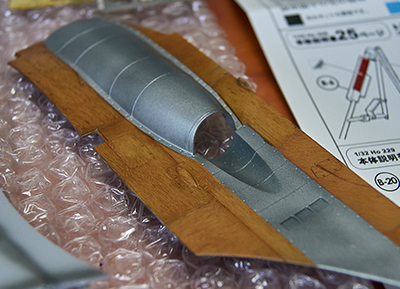
You might recall from the previous update this project includes a lot of “first times” for me. I normally don’t paint parts still on the sprue and I’ve never done wood effects using oils before. So how did it actually turn out? Well, funny you ask. It actually turned out pretty good.
As you can see in the photos, the wood effects look quite realistic and natural. I achieved this by using undiluted oil paints, the same you would use for any painting hanging on your walls. First, I sprayed a layer of light brown as a base coat. I then brushed on the oil paint with a normal paint brush. After letting it dry for a few minutes, I used a large brush to gently rub the oils off, which left a fairly rough-looking texture. A softer brush followed to repeat the process and gave me a gentler, scale-correct looking texture. To prevent all panels ending up looking the same, I also used a sponge with a dabbing motion to give each panel a random pattern. You may have noticed that I changed the direction of the streaking-motion on panels to break up the uniformity of the larger wings.
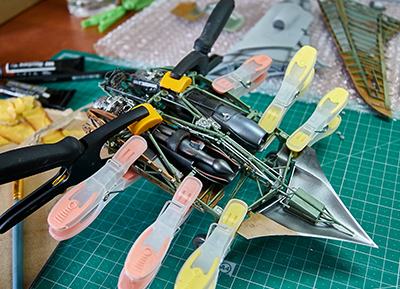
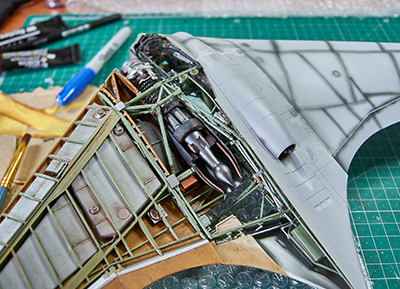
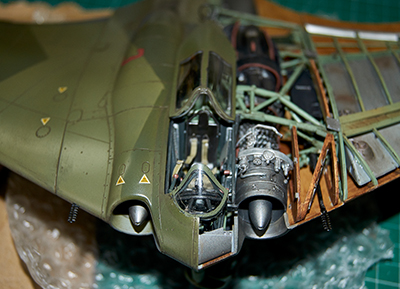
The downside of using oils is that it takes them a long time to dry, we’re talking days here. So, in the meantime I continued work on the rest of the model. I assembled the undercarriage, finished off the internal bits and put the cockpit seat together. The latter was enhanced with fabric seatbelts by HGW, which takes hours to put together (or at least in my case). All bits were then weathered a bit to match the rest of the aircraft. The weathering on this model is minimal and lighter than usual, as in the actual war it was only flying in the prototype phase and never saw real action.
Now that all sub-assemblies were ready and painted, I put them all together. It was only then that I noticed that my “modifications” to various parts of the aircraft caused issues trying to fit it all together. A few swear words and a bit of sanding later, it went together. The main problem ended up being the actual pins that hold the wings in place. For some reason they fitted very poorly and took a lot of time “wiggling” the wings until they fell into place.
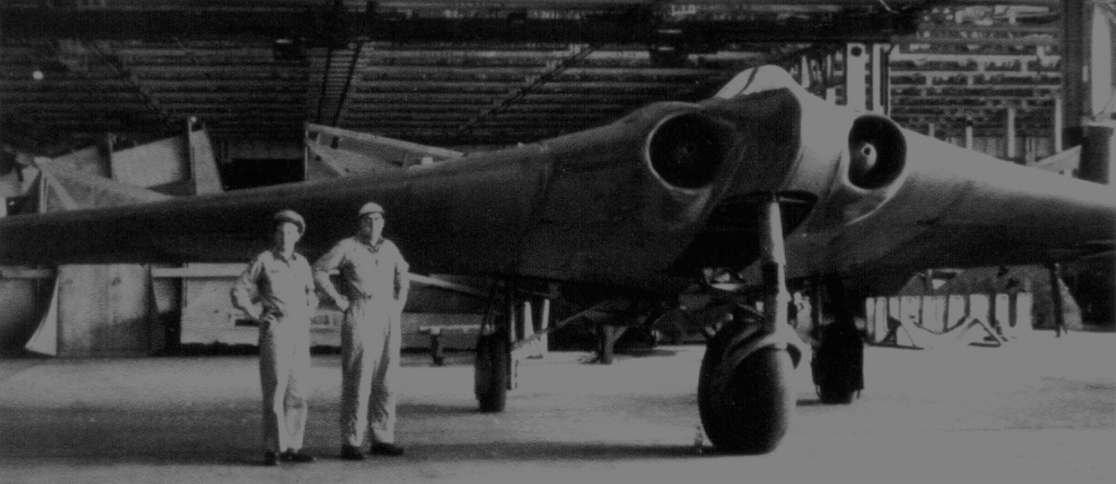
At this point the aircraft started to display its unusual form and rather large size. I decided to use a similar approach to the base for it as I did with the Spitfire where part of the wings will hang over the edge. I measured up the rough size and found a photo frame of similar dimensions that would suit perfectly for the job. While that was on order, the model went back to the spray booth and I painted the camouflage pattern on the right half of the aircraft. Because the aircraft never took part in any battles, there is no paint scheme for it, or at least not official. I based mine on similar designs of the late-war period used by the German Luftwaffe and went for a straight-edge camo scheme using a medium and dark green. The bottom was painted in a light-grey colour. The whole lot was then covered in a gloss varnish in preparation for decals.
Back on the main bench and I continued work by added all the decals. I didn’t know what to expect from the Zoukei-Mura quality, but I must say they’re very good, definitely amongst the top brands. They went on easy and conformed to the shape of the model very nicely.
Last but not least I covered the entire model with a coat of matt varnish before adding a light coat of weathering effects, mainly using washes and pigments.
At the moment I’m working on the base, which will be split in half where one side will be depicted in the field and the other side still in the factory (I’ll let you guess which side of the plane goes where). The figures were painted and still need their final detail touch-ups before they’re ready to be added to the diorama. All I need to do now is finish the base and I can call this project complete. More on that in the next update. See you then!
Return to Previous Page
Niek Nijsen Ltd.
Comp. Reg. (UK): 13778584
VAT. Reg. (UK): 398 4757 24
info@nieknijsen.com
Copyright
Niek Nijsen Ltd. © 2008 -
All Rights Reserved
Privacy Policy | Terms of Business