Another model?
Posted on June 05, 2015 by Niek Nijsen
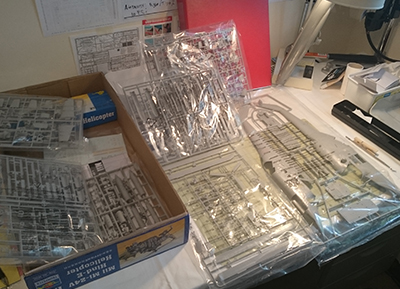
Another build?! Yes, another build indeed. I really needed a break from the BK-117 project after 300 hours and hardly any progress. So there I was, thinking what to build this time. It needed to be something that would be finished in a rather short period of time. Having come across photos of abandoned helicopters in Russia after the Cold War, I quickly found my new subject. The model would predominantly be made straight out of the box, although the interior could do with some extra details, thus I added the Verlinden kit as well. Minimizing the scratch-building on this helicopter, I limited this only to the engine bay and gearbox, thereby speeding up the process greatly.
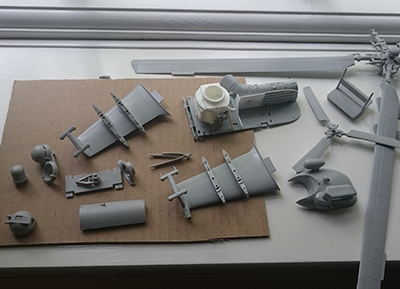
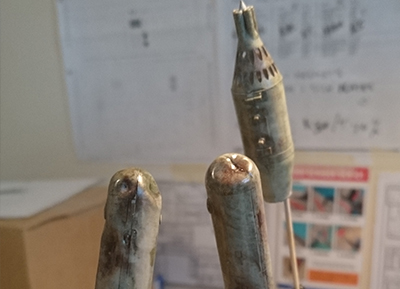
So, where do you start with a “straight from the box” build (never done this before)…? Well, apparently on page 1 of the manual. Still waiting on the Verlinden kit, I started putting together all the parts that were separate from the fuselage and interior. I started off by choosing my weaponry options, as the kit came with many, and selected 2 fuel tanks and 2 rocket pods. The pods will be mounted to the wings, one of the tanks will be hanging from the wing by a rope (yes, this is actually done with the real aircraft, too) and the other will be laying on a pallet with some other bits and pieces.
The weapons were followed by the rotorhead and blades, which were slightly altered as I wanted to remove 2 blades and lay them next to the helicopter to create a diorama (my very first one). More on this in a later post once I get going with that. The head itself is pretty detailed and doesn’t need much scratch building at all, just a few wires. The wings were build and most of the nose section followed. Somehow I think Trumpeter made a mistake with the wing molds, as one of them had a completely different shape than the other half, needing some work once put together to make it look decent. The wheels were sanded to create a deflated tire effect, which will later be enhanced one positioned onto the surface of the diorama.
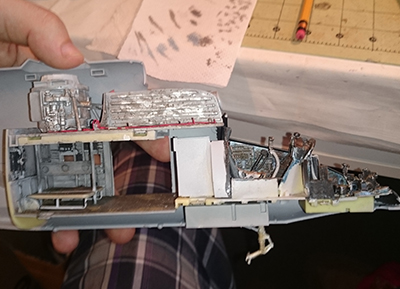
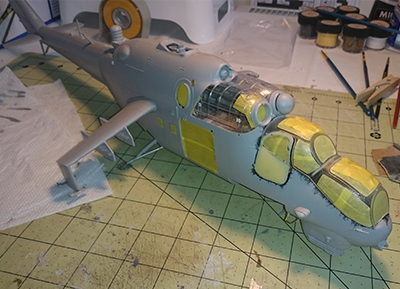
Most work was put into the engine bay and interior. Since I decided to remove one of the engine cowls as well as the engine, the engine compartment needed some serious work. Having found a time lapse video of (I think the Polish Air Force) a maintenance department refitting the gearbox and engines, I got going with adding wires, a gearbox and a firewall. Have a look at the photos for a detailed view of all the work that went into this. The interior from Verlinden needed a lot of sanding and “enhancing” to make it fit. I thought it was a very poor set, but it turns out the real aircraft has many faults and issues in regards to poor fitting of components too. Despite that, the kit needed some extra work to fit inside the fuselage.
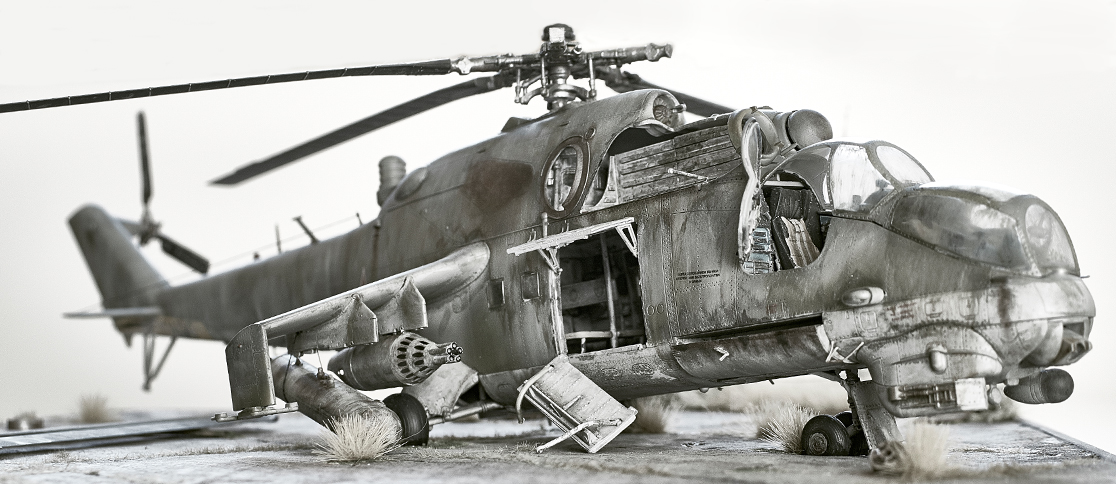
It’s safe to say that most work went into the paint job. That’s where my focus would be for this project in an attempt to recreate the weathered look. Having not done a model like this before, I’d be using a lot of new techniques and paints, only to hope it would work as I imagined it would. I started with a layer of primer. Normally I’d do this with the airbrush, but I decided to use spray cans from Tamiya, which actually work really well. Next was pre-shading, using the trusty airbrush with black paint to create panel lines and exhaust traces. The pre-shading was done very thin, which allowed me to follow directly with the next layer, the first camo colour. A green olive-drab colour went on in a random pattern, looking closely at real aircraft and the paint guide that came with the model. What resulted was a pre-shaded aircraft with weird looking green spots all over the place.
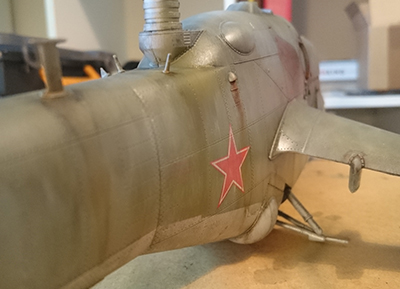
The weathered aircraft seem to have a blue-ish look to them, probably due to sunlight. Anyway, I tried recreating this by adding a few drops of blue colour to the grey that would go on next, in an attempt to cover the pre-shading and create a better contrast with the green camo. The lower half was masked off first, as this would remain in the primer-grey colour. I now have a model that looks like it’s new from the factory with some colour-blind person in charge of the paint job… Time for a clear coat to seal it all in.
With the base layers done, I added the decals and another layer of clear coat before starting the weathering process. I started by mixing black, green, and grey paint with thinner to create a wash (roughly 90% thinner). This was painted on with a brush before being absorbed in a random fashion with cotton earbuds and a dry brush. The wash will create a “rain and faded” pattern all over the helicopter. Next I used a sponge to make streaks from top to bottom. As soon as the wash dried, I blended all the colours together by using white oil paints (yes, the extremely bright colour that has nothing to do with a camouflage pattern). By using a sponge again, I rubbed the white paint on mainly the top surfaces, where the camouflage would have faded the most due to sunlight. I then added random spots on the sides before rubbing those out with the sponge again. All the colours were now nicely blended together. Another clear coat before the next step.
What’s an aircraft that’s been outside for 25 years without any rust? Indeed, time to add the rust. Mostly found around the exhausts and engine bays, I used a new product from MIG to create rust effects and streaks, using pigments in the process as well. Guess what, another clear coat after this to finish it off. I removed the masking tape and had a look at the overall result. Not bad, except that the windows are super clean compared to the rest of the model. So, out comes the brush and wash again to solve this issue. The windows were covered with the wash and mostly removed again with the sponge, creating rain streaks at the same time.
So, that’s most of the model done now. All that’s left to do is paint the blades and rotorhead before building the base diorama for the model. This will have to wait however, as I’m packing for my move to Sumburgh in a few weeks. Once I get back to work, I’ll update you on the process of this. Until then!
Return to Previous Page
Niek Nijsen Ltd.
Comp. Reg. (UK): 13778584
VAT. Reg. (UK): 398 4757 24
info@nieknijsen.com
Copyright
Niek Nijsen Ltd. © 2008 -
All Rights Reserved
Privacy Policy | Terms of Business