Gallons of Paint
Posted on October 29, 2022 by Niek Nijsen
She sure is a thirsty beast when it comes to paint. Obviously, I could have seen this coming a mile away. I mean when I first introduced this kit I mentioned the size of it, and somehow all of that needed covering at some point.
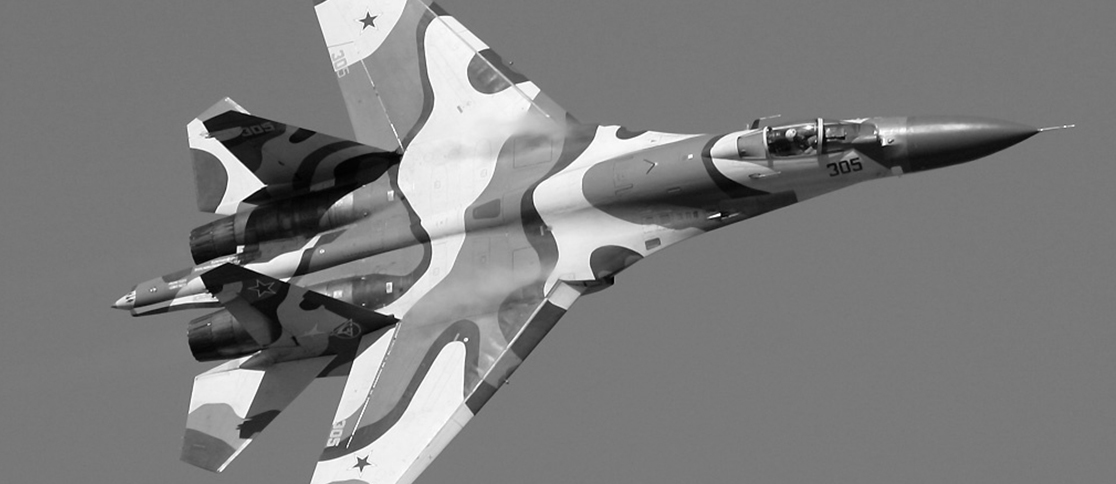
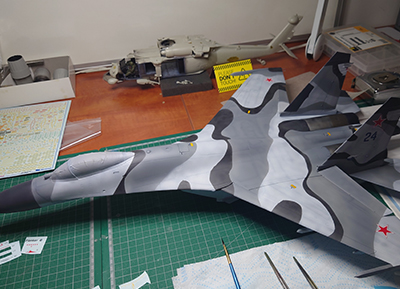
Well, that point has come (and gone) and I’m pleased to inform you that she’s now displaying her arctic camo close to how I envisioned it. Due to her size, I used primer from a spray can (still Mr. Surfacer 1500) which made quick work of the priming stage. Once that was dried, I began with the underside of the aircraft. Since I’ll be using a blue colour, I decided that instead of using black, I would use a brown tone for pre-shading, as it will be less “in your face”. I’ve got plenty of bottles left with versions of brown which were previously used for the King Tiger and Stuka projects. With the pre-shading applied, I changed the settings on my airbrush to the larger needle and paint cup and filled it with egg-blue. Odd colour, but hey, that’s what Ivan uses. I’m aware the original aircraft had a white underside, but I really like the blue appearance of the Russian fighter jets and as such, I decided to go with blue.
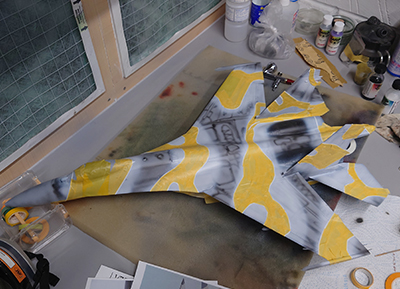
Now that the underside was all done, I could shift attention to the top half. This time I went back to pre-shading with black, since I’m using darker colours. Once done, I first sprayed the white colour, as it’s the one that covers the least with a single coat. I roughly sprayed the areas and made sure the pre-shading would still be visible. It took a few attempts, because the paint appears to be covering everything when wet, but once it dries is seems to “thin out” a bit. Not sure why, nothing a second coat couldn’t sort out. From here on out, the difficult and time-consuming stage of masking could no longer be avoided. Using photos of the real aircraft as a reference, I used Tamiya’s flexible masking tape to outline the areas, before covering the rest with different widths of their normal range. Time to introduce the next colour: grey.
You could probably argue that the Russian and US greys aren’t the same, but since I’ve got none of the first and plenty of the latter, it became a simple choice on which to use. I opted for light ghost grey, which would inevitably darken during the weathering phase. Heck, you probably wouldn’t have known the difference if I hadn’t told you ;) Anyway, the grey was applied in similar fashion as before, although this time it covered in a single coat. Too good actually, so I had to “thin” down my spray a bit as it soon started covering the pre-shading a bit too much. With the grey applied, it was time to bring out the masking tape again.
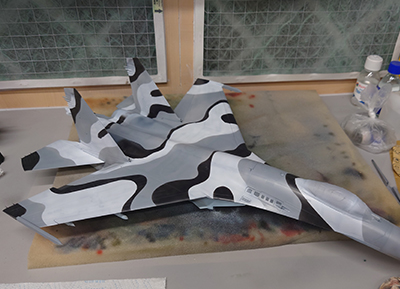
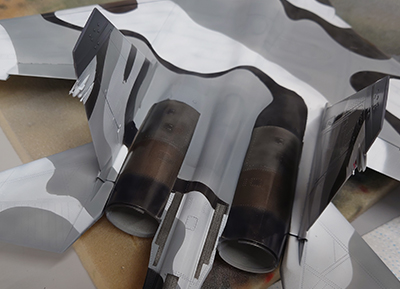
Okay, by now you’re starting to get the picture I’m sure. So, to speed things up, I applied the black colour next (a combo of NATO black and a Russian type black of which I’ve lost the name) and covered the remaining bits of the camo scheme. Lastly, I painted the exhaust covers and various panels on the wings with shades of metallic (titanium, aluminium, burnt exhaust, etc.). Finally, the paint stage is done.
Which brings us to the decaling stage. I noticed that the original aircraft didn’t have all of them present, which made me smile a bit as there’s simply too many of them to do. As my decal sheet is intended for a different aircraft, not all of them matched either. I didn’t care too much for that and elected to use the ones available instead and place them in roughly the same positions. All of them were then covered with a coat of satin varnish to seal them in and protect them from the weathering stages ahead.
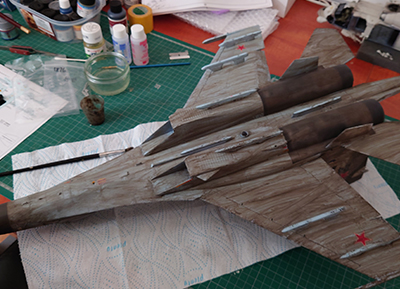
I wanted a dirty but not too dirty look for this aircraft. After all, it’s Russian and tends to operate from slightly less-than-perfect airfields. I used the dark wash for this and covered the entire aircraft with a copious amount of it. Now, at this point, I went for my surgery, which meant that the model would end up sitting on my bench for the next 2 months. Question being, will the wash come off again after so long? Well, it did, but not without a fight. I had to use an unusual amount of water applied with a big paint brush to then rub it all off with kitchen towels. Not the easiest of washes I’ve applied and it did result in a few small items being damaged (which were quickly repaired and glued back in place). I finished the weathering with a few paint chips and scratches on the wings and stabilisers, which tied it all in together nicely.
And that’s where we are now. The next step is to paint the weapons (which are still in bare plastic) and build a stand for the final display. More on that in the next update!
Return to Previous Page
Niek Nijsen Ltd.
Comp. Reg. (UK): 13778584
VAT. Reg. (UK): 398 4757 24
info@nieknijsen.com
Copyright
Niek Nijsen Ltd. © 2008 -
All Rights Reserved
Privacy Policy | Terms of Business