Update 6: Ready For Paint | February 19 - March 21
Posted on March 21, 2016 by Niek Nijsen
As I’m writing this update, the model is travelling through the UK to hopefully arrive later this week in preparation for painting.
The lower section of the tail, a resin part from PWMP, had already been added to the aircraft but I still needed to work on the top half. Out came the Tamiya saw and I cut the part as per instructions. Basically you cut it at the bottom of the vertical fin. I then added another resin bit on the top in order to match the AM tail. I won’t glue it on yet, as I need to check with the decals to make sure everything fits correctly.
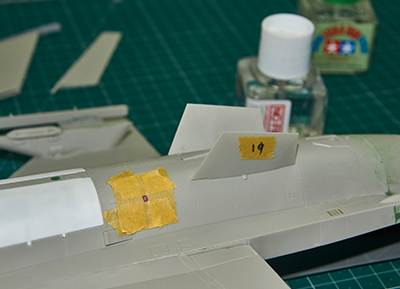
Another job to match the F-16AM consisted of filling various inlets and vents that aren’t located on older types. There were a few on the bottom of the fuselage and 1 or 2 on the top. The items were marked, masked, and then filled with putty before sanding.
I received the LANTIRN from PWMP and the ANQ-131 from AMS Resin which will be mounted on the belly of the aircraft. The mountings were glued in place and the gaps filled with putty. While working with the putty, I also filled a few gaps and seams that were too big.
Next up was the nosecone. In an attempt to strengthen the bond a bit, I added small styrene tabs on the inside and glued it in place. I cut off the probes which will be replaced with brass versions once painted. The same goes for the pitot tube.
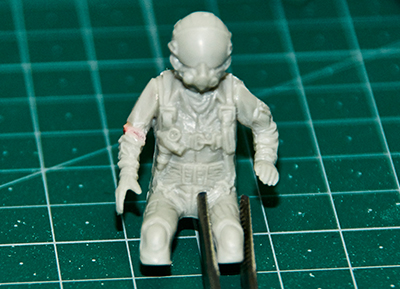
The pilot received some more work and I added the head and arms. In order to make the arms fit, I had to cut them at the elbow and slightly alter the angle before gluing them back together. I placed the pilot in the seat and glued the arms in place with CA. The gaps were filled with a bit of putty and Tamiya glue.
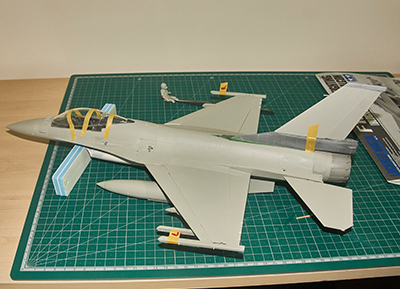
With work completed on the pilot, I started with assembling the pylons that are attached to the wingtips. The plastic part is fixed to the wing with 2 metal pins, with the clear part (which includes the nav lights) sandwiched in between. I haven’t glued the parts to the wing yet, as I’m unsure of how to mask the lights before painting. I did however made sure the fit is good and won’t require any filling later on.
Once all of the above was done, it was time to pack it all up and put in a big box, ready for shipping.
As soon as the box arrives here, I’ll start the paint process. In the meantime there’s a lot of work happening on my King Tiger project, which can be found in my signature. Hopefully the next update will be a bit sooner than this one.
Thanks for following this project!
Return to Previous Page
Niek Nijsen Ltd.
Comp. Reg. (UK): 13778584
VAT. Reg. (UK): 398 4757 24
info@nieknijsen.com
Copyright
Niek Nijsen Ltd. © 2008 -
All Rights Reserved
Privacy Policy | Terms of Business