Update 2: A Real Mega Update | January 02 - January 19
Posted on January 19, 2016 by Niek Nijsen
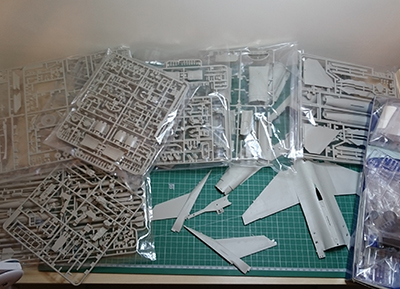
First things first, photos of the sprues and aftermarket parts as promised in my previous post: *
An overview of the things I’ve been working on during this period:
- Cockpit
- Engine inlet
- Weapons
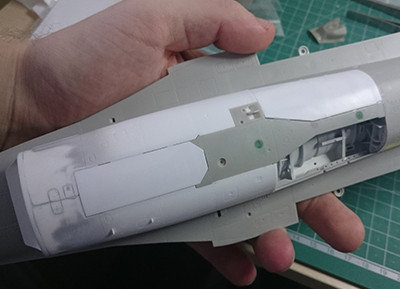
- Lower fuselage
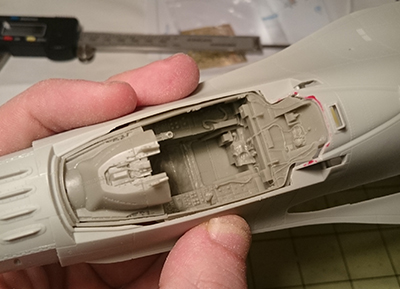
I started off with the original Tamiya cockpit, which I planned to upgrade with Eduard PE. I was eager to start and cut a lot of the parts in order to fit the PE bits as instructed. Well, at least that’s what I thought I was doing. Turns out I cut the wrong part of something and made it completely useless for the kit. I figured I would be able to save it by scratch building something later on, but I soon realised I’d lost the throttle lever, too. Great…. So, what to do now? Continue with this version and try to build things from scratch in order to save it, or spend 18 bucks on the Aires cockpit? After a quick discussion with the missus, I visited Ebay and ordered myself a set. I wouldn’t be able to do anything on the kit until it arrived, as the rest of the kit was waiting for me at my girlfriend’s place in the Midlands. Oh well, guess the King Tiger could do with some attention instead. Photos of the original Tamiya cockpit: *
The new Aires cockpit arrived on Thursday and I was back in business. I thought this would be a quick fix but boy was I wrong. Perhaps I should have read a bit more on the internet since it doesn’t fit at all! More of an aftermarket downgrade than upgrade if you ask me. Yes, the details are great, but getting it to sit nicely inside the F-16 is a real mess. I’ve been cutting, grinding, and sanding for hours to get it to fit, sort of. Gaps everywhere and unsure whether it would work, I put it aside and decided I would have a look with the cockpit window fitted. But that part was still at the other location, so this would have to wait. *
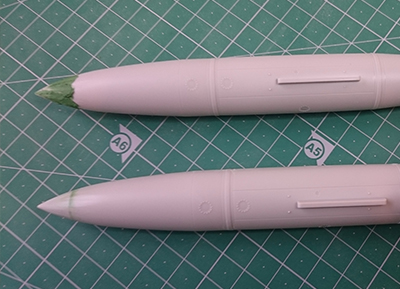
While waiting for the Aires cockpit, I received a package from the States, which contained parts of the Thunderbird “NSI” inlet. Since I had nothing to do, I got it out of the box and began working it (stupidly enough completely forgetting to take a photo of it, I really need to put up a sticky note somewhere to remind myself!). The reason I got the Thunderbird inlet is because it’s still the old, smaller version, which is also fitted to the Dutch F-16’s. I put the parts together and filled the seams with green putty before sanding it all smooth. I then primed it with Mr. Surfacer 1200 followed by Vallejo 71.001 “White”. Having worked with enamels until now, I seem to have some serious problems with acrylics. Not sure if it’s me or rubbish paints, but after two attempts and sanding it all down again (taking over 2 hours), I ended up spraying the parts with my trusty old enamel paints and airbrush (taking only 5 minutes). And then I spend another hour trying to clean my 2nd (acrylic) airbrush, since some of this s*** Vallejo paint dried inside the nozzle!!! (Any tips welcome, I sprayed a rough 60/40 mix at about 18 psi, but it flooded the parts straight away). *
The rear section of the inlet is done as well. I glued the halves together, filled the seams with putty and sanded it all smooth again (which takes way too long in my opinion, especially because you won’t see it anymore once it’s positioned on the stand). I then added the front half of the engine to the back of it in order to seal the gap for anyone who does try to look inside. At least there’ll be a fan to look at. This was then painted white as well, with the same problems as before since I did both parts at the same time. *
The weapons took a lot of time to put together and fit nicely without any seams and became the main focus of the time spend at my girlfriend. Glued the part together, filled the gaps with green putty and sanded it all smooth once dry. They look a lot better now and almost ready for primer and paint. *
I’ve been adding a lot of parts to the lower half of the fuselage. Items such as the rear ring to which the exhaust will be mounted, the mounting for the tail hook, and a few other bits and pieces. I also screwed in parts of the inlet and engine bay. *
The wings and flaps have been marked with red pen because a few items will have to be removed to convert the C model to an F-16AM (including the radar extension on the leading edge, and the “blobs” on the top of the wings). *
Besides the above I’ve been filling some gaps on the bottom half and fitted the doors in the closed position as well. *
That’s it for now, more to follow soon as I’ll be painting the cockpit and hopefully make it fit nicely in the aircraft. Stay tuned and thank you for following my build! More photos can be found on my website (in bigger size, too).
P.S. Photos mentioned in the above update (marked with a *) can be found in the photo album.
Return to Previous Page
Niek Nijsen Ltd.
Comp. Reg. (UK): 13778584
VAT. Reg. (UK): 398 4757 24
info@nieknijsen.com
Copyright
Niek Nijsen Ltd. © 2008 -
All Rights Reserved
Privacy Policy | Terms of Business