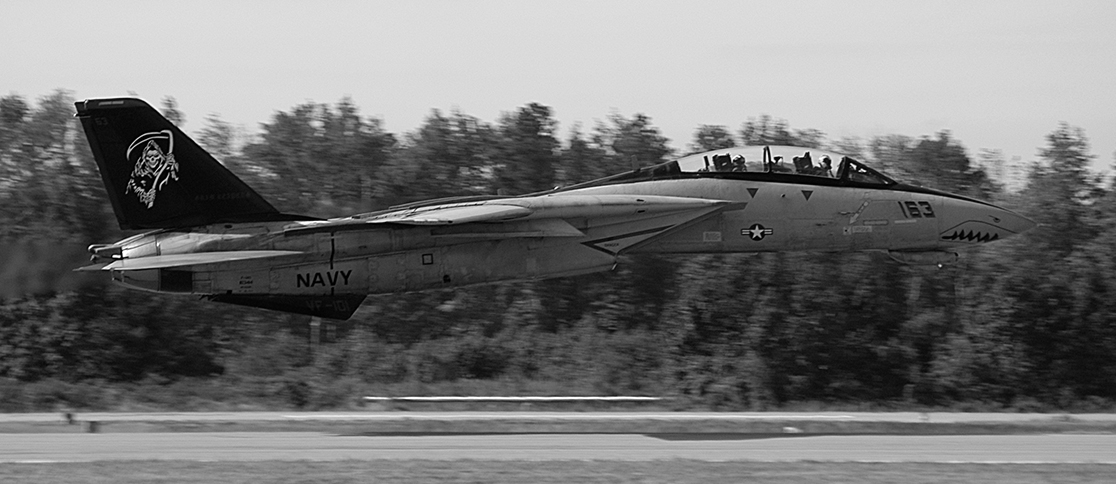
Armed to the Teeth - Pt. 2
Posted on July 30, 2022 by Niek Nijsen
After the last update, I was left with a few outstanding jobs which were needed to finish the weapons. Among these were the fire protective coating on the bombs, their pallet(s), and the wing pylon. Once they were all ticked off, I could begin work on the next item on the endless list: installing the first (of many) LED lights.
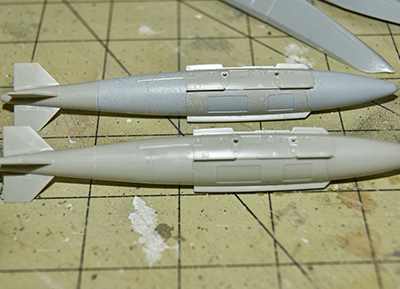
But first, back to the weapons. The GBU-31 bombs that I stole from Tamiya are very nicely detailed, but for some reason miss their signature fireproof coating. It may be that the USAF version doesn’t have this applied and is only used on aircraft carriers in the Navy? Either way, I needed to add this coating as they bombs didn’t come with this textured appearance. I applied Mr. Surfacer 1500 and let I dry for a few minutes until it became “sticky”, before using and old (stiff) brush in a tapping motion to create the rough texture effect. Sadly, the old brush was of poor quality by now and lost a lot of hair which meant that after every 10th tap or so I had to pick one out before continuing. I tried my best to avoid the metal parts cradle that mount the bomb to the aircraft, and a little sanding will be required prior to paint to make sure there’s no coating on these bits. Overall, the effect looks very realistic and once the bombs have been painted, they’ll look just like the real thing (let’s hope so anyway).
The second bomb pallet has also been made. I elected to construct this one slightly different in that I used the PE cut-offs to create the structure inside the pallet, instead of using styrene. The bomb rack itself was glued in place and the edges all finished with a bit of filler and sander to finish it off. I ended the process by adding the wiring, which I did in the same fashion as the first pallet but slightly altered the “connectors”. Once happy, I repeated this last step with on the first pallet and although you can’t see much of them once the bombs are in place (if at all once fitted to the aircraft), I’m happy with the result now.
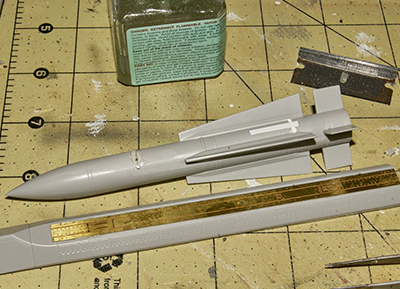
Remember when in the last update I said the Phoenix AM-54 missiles were good enough straight from the box, aside from a bit of PE? Well, after having looked at plenty of photos, I started to realise they weren’t that great after all. If I wanted to enhance the pallet with the PE detail, I needed to come up with a way to mount the missiles since the mounting tabs would have to be cut off. Back to the drawing table I went. The alteration process began by filling the holes found in the missile in which the tabs slot into, which now meant that the missile would sit too close against the pallet. I used a thin strip of styrene to create a “spacer” for the back end that I glued between the fins. You won’t be able to see this once the whole lot is in place underneath the aircraft. The front mounting point was a different story, as these will be in full view. I ended up sanding down the bomb mounts from the F-16 kit that I found in the spares box as they looked very closely to their real-life counterpart and glued them onto the Phoenix missiles. The combination would give me the (almost) correct distance and if it wasn’t for the slightly incorrectly moulded pallets, they would look perfect. Sadly, to reshape the pallets themselves would be almost impossible unless I go down the resin route, which for now I’m not considering. Maybe once everything is in place and I’m not happy with the look of it, but until then we’ll leave them as they are.
The last step in completing the weapon chapter for now, would be to assemble the right-wing pylon that holds the LANTIRN pod and one of the Sidewinder missiles. Again, as with the opposite side, the seams were pretty poor and required a healthy dose of filler and sanding before they looked anything like the photos in the reference book. Having seen the close-up photos now while writing this post, I think another thin coat and sanding is required to get it to the level needed for this super build. I’ll just add that to the already long list of things to do…
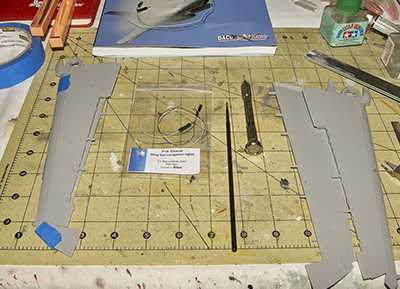
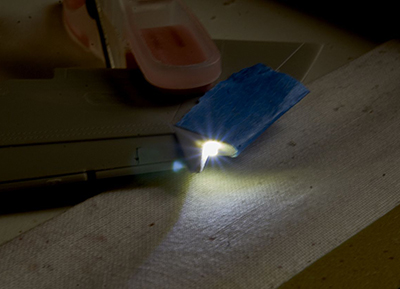
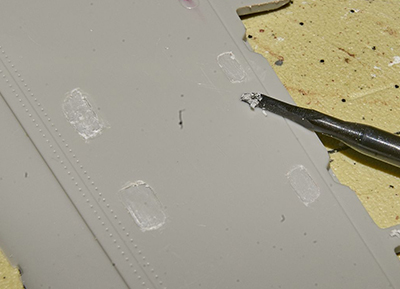
Right, enough about these weapons. Yes, I know it’s a fighter jet and it needs weapons to function, but more importantly it needs wings to get into the air to begin with! And so, attention shifted to the assembly of the main wings, which would also be a great test platform to see how I’m going to install the LED lights that will be fitted to the model. As you can see in the instructions photo, the wings consist of plenty of parts already and that isn’t including the PE and nano-LED yet. I first drilled a hole where the tip-lights are going to be and using a lethal scriber (try not to stab yourself with these, it hurts) I “dug” a channel from there towards the centre of the wing where the wire would run so that the wing tips sit flush when glued together. The next step would be tedious one. Normally, PE tends to be glued onto the plastic directly (at least as per the instructions), but that would mean that all the inspection hatches that are located on the topside of the wing would protrude from the wings. All photos show that they were flush with the rest of the wing structure, as expected, and so, in order to make mine do the same, I had to scrape out roughly half a mm from the wing where these PE replacement parts would sit. Maybe I should have practised on a scrap piece of plastic (hint), but after the first two I got the hang of it and the other 11 ended up looking pretty good and require minor filling (if at all) once the parts are in place. With all the rough work completed on the left wing, it was time to install the nano LED and glue the two halves together. The wire inside is secured using tape and super glue and exits the wing through a little hole I drilled at the root of the wing, which will be inside the aircraft once assembled. Obviously, a complete overkill of pegs and clamps were used to glue both halves together, just to stop a gap from appearing anywhere. A quick pass of the sanding stick would remove any glue that seeped out and voila, we have ourselves the first main structure of the wing.
I still had to do assembly all the slats, flaps, ailerons, and spoilers, most which fitted poorly to begin with. Especially the slat system at the front of the wing needed extensive sanding to fit properly. I could probably have avoided this by having the slat in the extended position, but because my model will be on the deck of the carrier, the wings are normally folded and so, all my wing extensions need to be as well. The rear ailerons were also missing a very obvious seam line, which oddly was present at the top side but not the bottom. Using masking tape to get the correct position and have something to scribe against, I quickly added this before installing the part to the main wing. And so, we now have our first completed wing, the PE parts still outstanding.
Before starting the second wing, I wanted to do something simple and quick. I chose the horizontal stabilizers, and they were quickly glued together. As with the wing pylons, Trumpeter decided to have a weird seam line running somewhere where it shouldn’t be because of they way the two halves go together and as previously, a healthy amount of filler was needed to resolve this issue.
Next time, we’ll continue with the finishing touches of the horizontal stabilisers, and we’ll start work on the second wing. I had a quick look at the tail fins and boy-oh-boy are they going to be difficult to install the multiple LEDs onto… Stay tuned!
As always, thank you for your following, comments, and feedback!
Return to Previous Page
Niek Nijsen Ltd.
Comp. Reg. (UK): 13778584
VAT. Reg. (UK): 398 4757 24
info@nieknijsen.com
Copyright
Niek Nijsen Ltd. © 2008 -
All Rights Reserved
Privacy Policy | Terms of Business